Overview
This is about installing Ubuntu 20.10 on a Raspberry Pi 4. I did not have a MicroHDMI cable, so I installed and performed the initial setup without connecting a keyboard or display.
I install Ubuntu and make it possible to log in by SSH from a PC, while using the Cloud-init (user-data) mechanism so that as little work as possible is needed after boot.
In a previous article, after installing and booting Ubuntu, various settings still had to be done. This procedure automates that part: [Raspberry Pi 3] Installing Ubuntu 18.04 LTS (no keyboard or display required)
What to Prepare
Raspberry Pi 4 8GB RAM
Raspberry Pi case
USB Type-C power supply
MicroSD card 128GB
An aluminum case looks stylish and also works as a heatsink, so it is nice. It also seems better to have a MicroHDMI cable ready in case of trouble.

Installed Environment
Ubuntu Server 20.10 64-bit (arm64)
Since the RAM capacity has increased, I chose the 64-bit version.
Depending on the use case, Ubuntu Server 20.04.1 LTS (arm64) may also be a good choice.
Download and Install Ubuntu
Download Raspberry Pi Imager from the official site and install it on the working PC. Raspberry Pi Imager handles everything from downloading the OS to writing it to the SD card. It is excellent because it supports not only Raspbian but also Ubuntu and other operating systems.
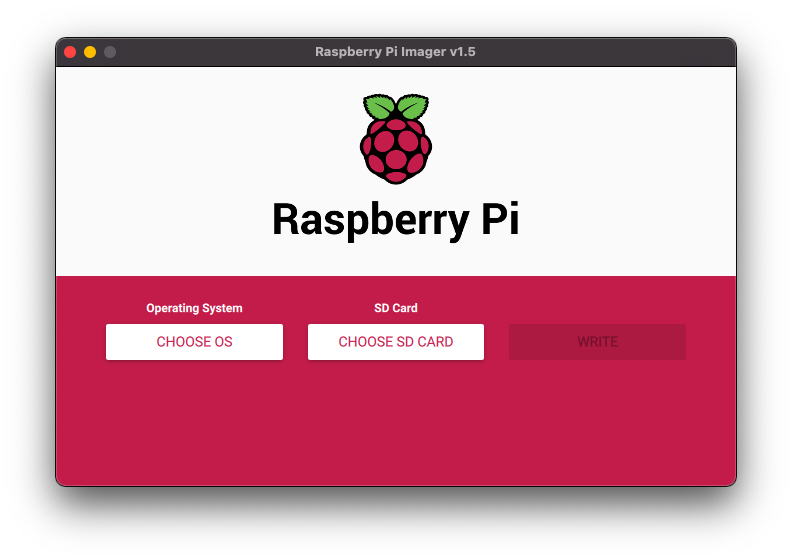
After launching Raspberry Pi Imager, just select Ubuntu Server 20.10 64-bit (arm64) and the destination SD card, then click "Write".
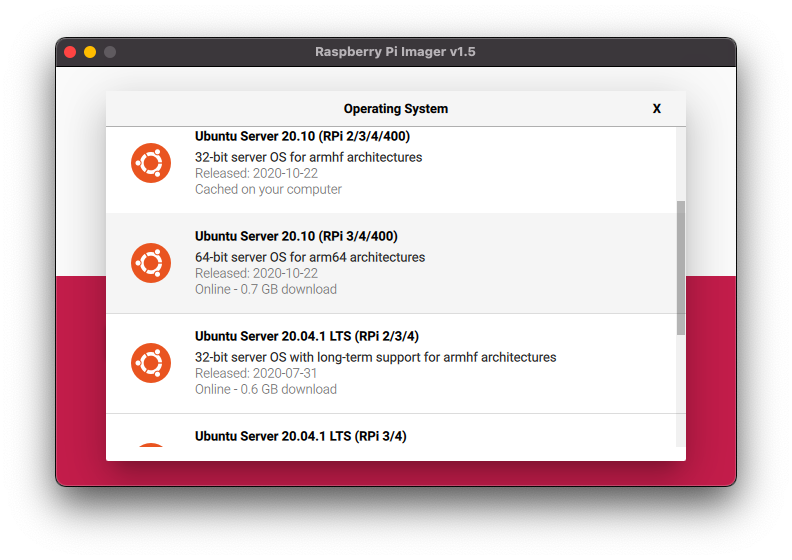
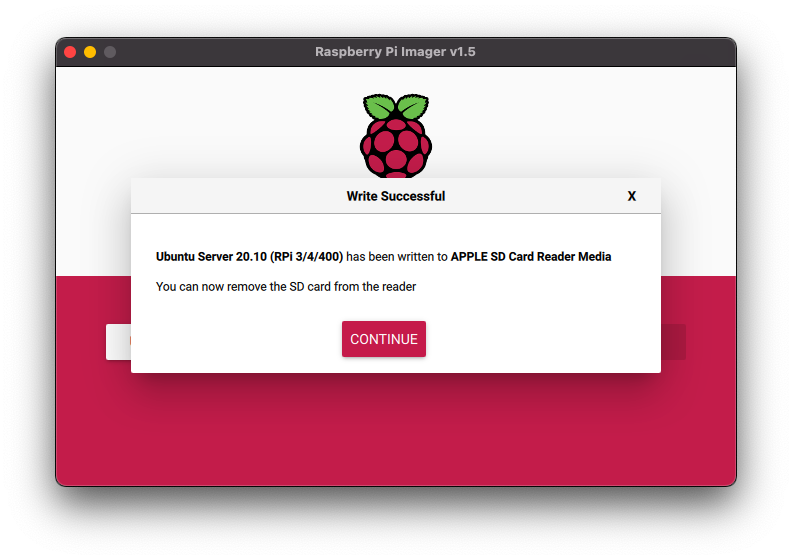
After waiting for a while, writing to the SD card completes. In the past, I had to prepare the OS image and writing tool myself, which made this work more troublesome.
Pre-Boot Settings
Do not use the Raspberry Pi yet. Insert the SD card with the Ubuntu OS image written to it back into the working PC.
By adding pre-configuration to files in the SD card's System-boot partition, you can prepare the base settings for a home server from the first boot.
Network Settings: network-config
By editing the network-config file on the SD card, you can configure the network in advance. In my environment, I set the Wi-Fi settings here, including SSID, password, static IP, DNS, and default gateway. If you use wired LAN, I think setting a static IP for eth0 is enough.
(Official documentation) https://cloudinit.readthedocs.io/en/latest/topics/network-config-format-v2.html
# network-config の設定例
version: 2
ethernets:
eth0:
# Rename the built-in ethernet device to “eth0”
match:
driver: bcmgenet smsc95xx lan78xx
set-name: eth0
dhcp4: true
optional: true
wifis:
wlan0:
access-points:
MYWIFI-SSID:
password: “MYWIFI-PASSWORD”
addresses:
- 192.168.68.20/24
gateway4: 192.168.68.1
nameservers:
addresses:
- 192.168.68.1
dhcp4: no
dhcp6: no
optional: true
For people who are not familiar with networking, DHCP plus wired LAN has the lowest barrier.
However, without a monitor, it is not easy to know the IP address assigned to the Raspberry Pi, so it may be good to install avahi-daemon in the package installation section of user-data. Then, even if you do not know the IP address, you can access it with hostname.local, for example pi4.local.
## パッケージのインストール
packages:
- emacs-nox
- avahi-daemon
Initial Settings: user-data
This time I used user-data to configure the following settings.
Set the hostname: pi4.your.hostname
Set the time zone to "Asia/Tokyo"
Set the locale to "ja_JP.UTF-8"
Disable SSH password login
Do not create the default user (ubuntu)
Create my own user (myuser)
Import an SSH public key (write it to .ssh/authorized_keys)
Install Emacs
Extend SD card life (/tmp, /var/tmp, and /var/log as RAM disks)
Install Docker
Configure the firewall
#cloud-config
の設定例
ホスト名の設定
hostname: pi4.your.hostname
# タイムゾーン、ロケールの設定
timezone: “Asia/Tokyo”
locale: “ja_JP.UTF-8”
SSH でのパスワードログインを禁止
ssh_pwauth: false
グループの作成
groups:
- docker
ubuntuユーザの作成を止めて、自分用ユーザーを作る。複数ユーザ作りたい場合は、-name 以下をユーザ分追記する。
users:
- default # ここのコメントを外すと、デフォルトユーザ(ubuntu)が作られます。
- name: myuser
gecos: I am an user.
primary_group: myuser
groups: [adm, audio, cdrom, dialout, dip, floppy, lxd, netdev, plugdev, sudo, video]
shell: /bin/bash
sudo: ALL=(ALL) NOPASSWD:ALL
パスワードログインは使わない
lock_passwd: true
githubのアカウントに設定してある公開鍵をインポートする(とても便利!)
ssh_import_id:
- gh:my_github_account
githubに設定していない場合は、直接公開鍵を書いておけば良い。
ssh_authorized_keys:
- ssh-rsa AAAAB3NzaC1yc2EXXXXXXXXXXXXXXXXXXXXXXXXXXXX
初回起動時にパッケージのアップデートを行う。お好みで設定する。
#package_update: true
#package_upgrade: true
パッケージのインストール
packages:
- emacs-nox
- avahi-daemon # pi4.local みたいな感じで名前解決ができる
サーバー用途ではSDカードがすぐ壊れるので、RAMDISKを使って対策をする
/tmp,/var/tmp,/var/logをRAMDISK化する
mounts:
- [ tmpfs, /tmp, tmpfs, “defaults,size=256m”, “0”, “0” ]
- [ tmpfs, /var/tmp, tmpfs, “defaults,size=256m”, “0”, “0” ]
- [ tmpfs, /var/log, tmpfs, “defaults,size=128m”, “0”, “0” ]
Docker のインストールとfirewallの設定をする
Docker はお好みで。Firewall は必須。
runcmd:
- apt-get install -y apt-transport-https ca-certificates curl gnupg-agent software-properties-common
- curl -fsSL https://download.docker.com/linux/ubuntu/gpg | apt-key add -
- add-apt-repository “deb [arch=arm64] https://download.docker.com/linux/ubuntu $(lsb_release -cs) stable”
- apt-get update -y
- apt-get install -y docker-ce docker-ce-cli containerd.io
- ufw limit ssh
- ufw enable
Boot the Raspberry Pi
Insert the SD card into the Raspberry Pi and turn on the power. After waiting a few minutes, the Raspberry Pi will be ready to use. If you can log in with SSH, it is OK. With the example user-data above, Docker is also installed, so it took about 10 minutes for cloud-init's final stage to finish.
The public key is set in .ssh/authorized_keys, and UFW is also configured. The default ubuntu user is no longer created.
$ sudo ufw status
Status: active
To                         Action      From

22/tcp                     LIMIT       Anywhere
22/tcp (v6)                LIMIT       Anywhere (v6)
RAM disks are also used from the start.
$ df -h
Filesystem      Size  Used Avail Use% Mounted on
tmpfs           782M   20M  762M   3% /run
/dev/mmcblk0p2  116G  3.5G  107G   4% /
tmpfs           3.9G     0  3.9G   0% /dev/shm
tmpfs           5.0M     0  5.0M   0% /run/lock
tmpfs           4.0M     0  4.0M   0% /sys/fs/cgroup
tmpfs           256M     0  256M   0% /tmp
tmpfs           128M  660K  128M   1% /var/log
tmpfs           256M     0  256M   0% /var/tmp
/dev/mmcblk0p1  253M  153M  100M  61% /boot/firmware
tmpfs           782M  4.0K  782M   1% /run/user/1000
Additional Notes About user-data
I do not recommend it, but if you want to log in over SSH with a password, use the following settings in user-data.
# パスワードの
変更
chpasswd:
  expire: false
  list:
  - myuser:MYUSER_PASSWORD
SSHのパスワード認証を有効にする
ssh_pwauth: true
Also, when importing a GitHub public key with ssh_import_id, you can view your public keys at the URL below. It is a good idea to check in advance whether the public keys can be accessed.
https://api.github.com/users/xxxx/keys
(Replace the xxxx account part with your own GitHub ID.)
If you cannot use a mechanism such as GitHub, delete the ssh_import_id section and instead write the public key directly in ssh_authorized_keys.
  ssh_authorized_keys:
  - ssh-rsa AAAAB3NzaC1yc2EXXXXXXXXXXXXXXXXXXXXXXXXXXXX
Debugging cloud-config (user-data)
For the user-data settings, I referred to the official documentation below when adding and changing settings.
https://cloudinit.readthedocs.io/en/stable/topics/examples.html
https://cloudinit.readthedocs.io/en/latest/topics/modules.html
How I Did Trial and Error with user-data
I did not know much about cloud-init, so until the configuration settled, it was repeated trial and error. I created the settings in the following order.
First, complete only the network settings and make sure you can log in to the Raspberry Pi. For the moment, ubuntu/ubuntu is fine.
Look through the official documentation for what seems possible.
Since user-data can also be edited after logging in to the Raspberry Pi, edit it as needed.
$ sudo vi /boot/firmware/user-dataReset cloud-init.
$ sudo cloud-init clean
$ cloud-init status
status: not run
Run cloud-init again.
$ sudo cloud-init init
$ sudo cloud-init modules --mode config
$ sudo cloud-init modules --mode final
cloud-init has three stages: init, config, and final. Each stage can be run separately. Which modules run in which stage is defined in /etc/cloud/cloud.cfg.
# init で実行されるモジュール
cloud_init_modules:
- migrator
- seed_random
- bootcmd
- write-files
- growpart
- resizefs
- disk_setup
- mounts
- set_hostname
- update_hostname
- update_etc_hosts
- ca-certs
- rsyslog
- users-groups
- ssh
cloud-init modules –mode config で実行されるモジュール
The modules that run in the ‘config’ stage
cloud_config_modules:
Emit the cloud config ready event
this can be used by upstart jobs for ‘start on cloud-config’.
- emit_upstart
- snap
- ssh-import-id
- locale
- set-passwords
- grub-dpkg
- apt-pipelining
- apt-configure
- ubuntu-advantage
- ntp
- timezone
- disable-ec2-metadata
- runcmd
- byobu
cloud-init modules –mode final で実行されるモジュール
The modules that run in the ‘final’ stage
cloud_final_modules:
- package-update-upgrade-install
- fan
- landscape
- lxd
- ubuntu-drivers
- puppet
- chef
- mcollective
- salt-minion
- reset_rmc
- refresh_rmc_and_interface
- rightscale_userdata
- scripts-vendor
- scripts-per-once
- scripts-per-boot
- scripts-per-instance
- scripts-user
- ssh-authkey-fingerprints
- keys-to-console
- phone-home
- final-message
- power-state-change
If it does not work, check /var/log/cloud-init.log.
Summary
When the power is turned on, Ubuntu with the basic settings completed becomes usable. The work I used to do after installation is gone, which is very convenient.
cloud-init is a general-purpose mechanism, so I think it can also be applied to AWS operations.
Please give it a try.
The configuration files I used this time are on GitHub: https://github.com/kitter11/RaspberryPi

When I used the Pi 3, there was a huge amount of work after installation, but this has become much cleaner. Next I should start WordPress, Postfix, and the like with Docker and replace the Raspberry Pi 4 as the main home server.
If I install avahi-daemon from the beginning, maybe I can access it by hostname even with DHCP. I should test that.