I only recently noticed that Raspberry Pi OS has a 64-bit version, so I will install it on a Raspberry Pi 4. As usual, this assumes no keyboard, mouse, or display is connected to the Raspberry Pi.
Like when installing Ubuntu, this records the steps up to installing the OS and logging in from the host PC (Windows) over SSH. This time I use an SSD for storage instead of an SD card.
Test Environment
Raspberry Pi 4, 8GB memory
Buffalo external SSD 480GB SSD-PSM480U3-B/N
The setup work is done on Windows.
Write the 64-bit Raspberry Pi OS Image to the SSD
Prepare the OS image on the host PC (Windows).
Use Raspberry Pi Imager to write the 64-bit Raspberry Pi OS to the SSD.
1. Download Raspberry Pi Imager from the official site and install it. The version at this time was 1.6.2.
*Update, February 2022: version 1.7.1 has been released and is easier to use.
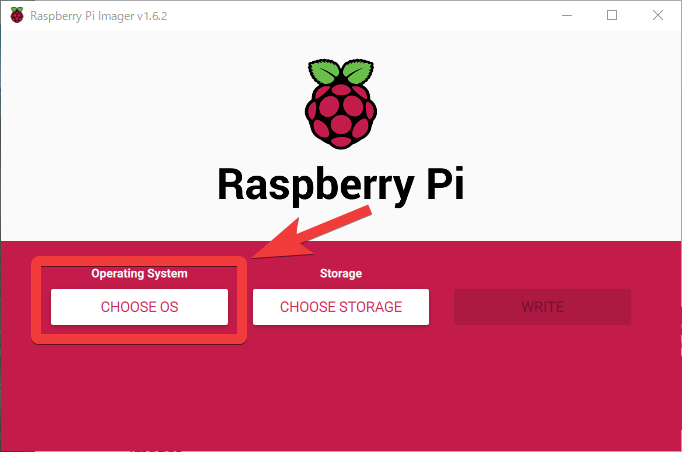
2. Start Raspberry Pi Imager and click "CHOOSE OS".
3. In the displayed list, Raspberry Pi OS only appears as the 32-bit version.
*Update, February 2022: in 1.7.1, the 64-bit version can be selected, so you can skip the following steps.
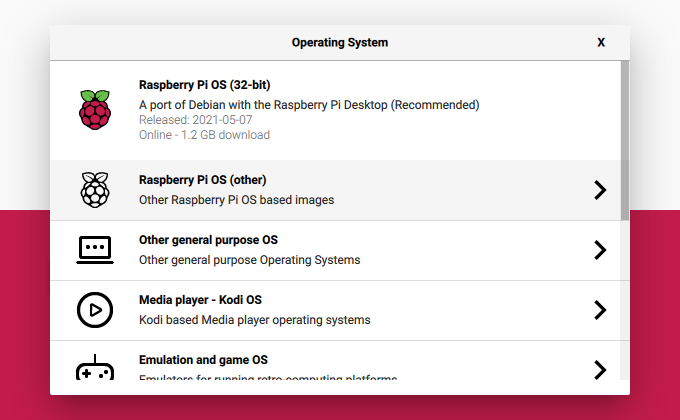
You need to obtain the 64-bit Raspberry Pi OS image separately from the download site.
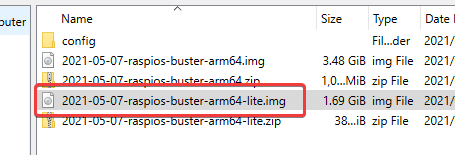
This time I downloaded and used 2021-05-07-raspios-buster-arm64-lite.zip.
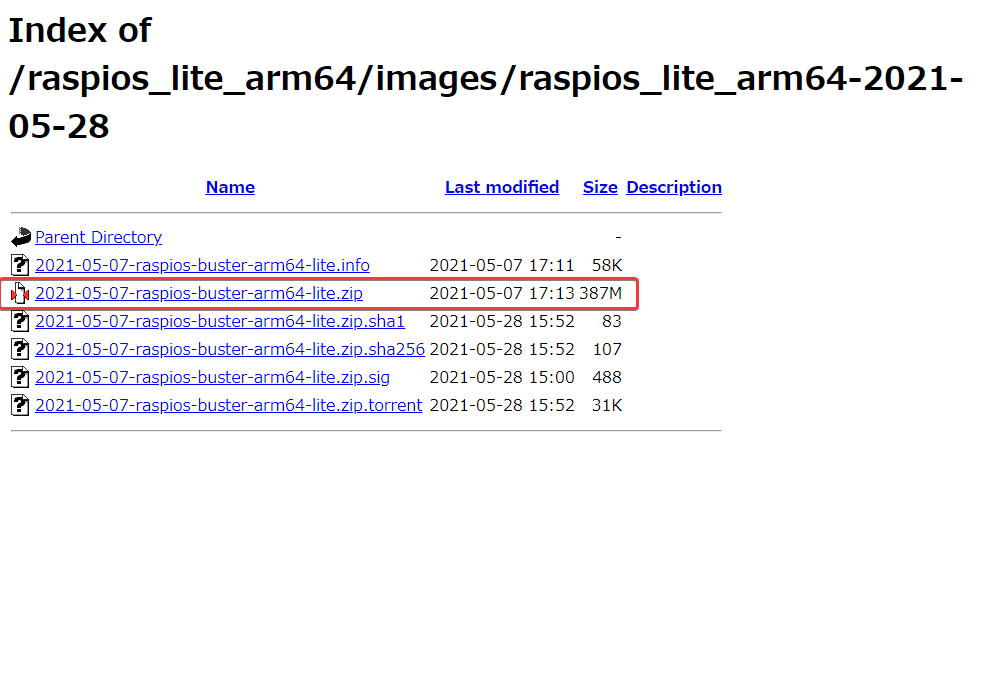
When extracted, the downloaded ZIP becomes the image file 2021-05-07-raspios-buster-arm64-lite.img. The size is about 1.7GB. If you want to use a desktop environment, use the image from the FULL version. That one is about 3.6GB after extraction.
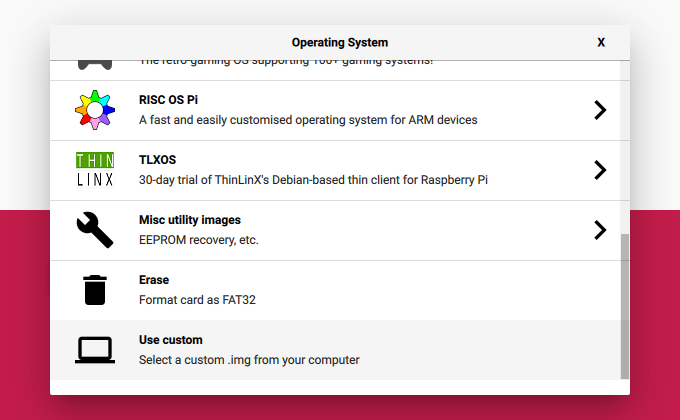
4. Return to Raspberry Pi Imager. In the OS selection area, choose "Use custom" at the bottom and specify the image file you downloaded and extracted.
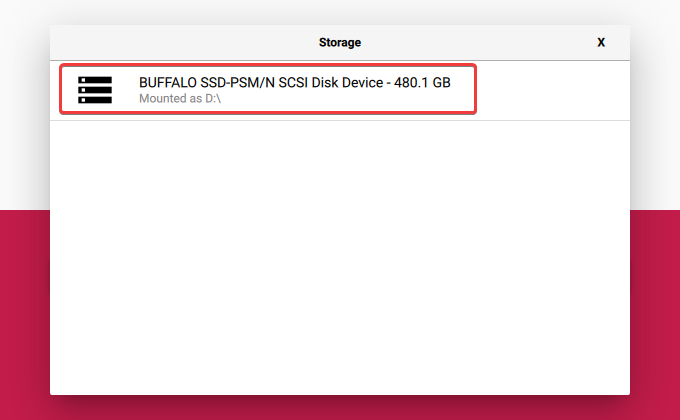
5. Connect the SSD drive to the PC and select it with "CHOOSE STORAGE".
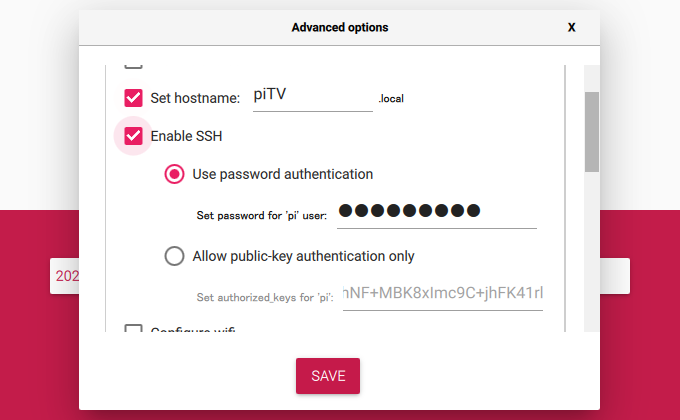
6. Configure the initial settings before writing the image.
Press Ctrl + Shift + X on the keyboard at the same time to display the settings screen.
*Update, February 2022: in 1.7.1, there is a gear button, so you can click that to display the settings screen.
Set the hostname for the Raspberry Pi, check Enable SSH, and set the password for the pi user. If you know what you are doing, paste in an SSH public key to enable more secure passwordless access.
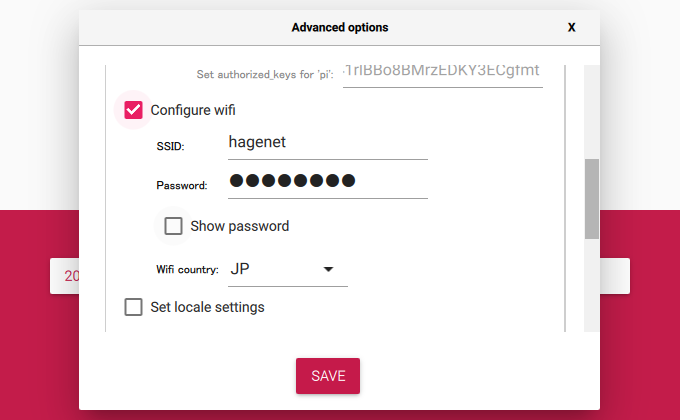
Set the Wi-Fi SSID and password. This makes it connect to Wi-Fi from the first boot.
Also set the time zone. I am not sure whether it is required, but to be safe, also check "Skip first-run wizard".
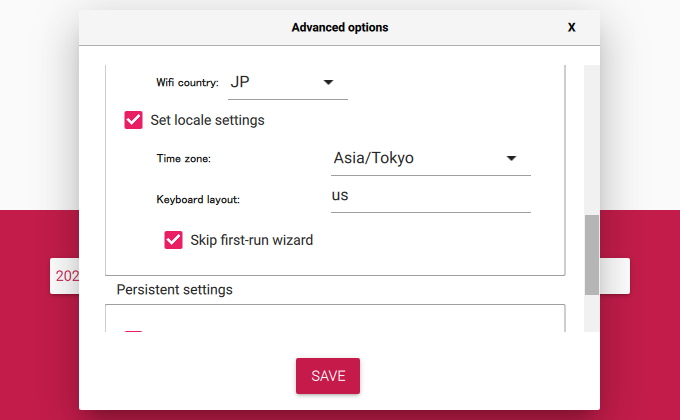
Click SAVE, return to the first screen, then WRITE.
Writing completes in about 30 seconds with an SSD. Fast. Remove the SSD from the PC and connect it to the Raspberry Pi.
Initial Setup
With Ubuntu, it was necessary to write various settings from Windows before starting the Raspberry Pi, but this time there is nothing special to do.
The mechanism is that firstrun.sh on the boot partition is called only on the first boot, so if you want to add anything, it looks like you can write it there. GPU settings will also apply from the first boot if you write them in config.txt.
Start the Raspberry Pi
After connecting the SSD, turn on the Raspberry Pi. The Buffalo SSD is compact but has an access lamp. Wait until the lamp blinking settles down.

While checking with ping, wait for the Raspberry Pi to connect to the network. Since avahi-daemon runs, you can access it by the hostname specified in the settings. Convenient.
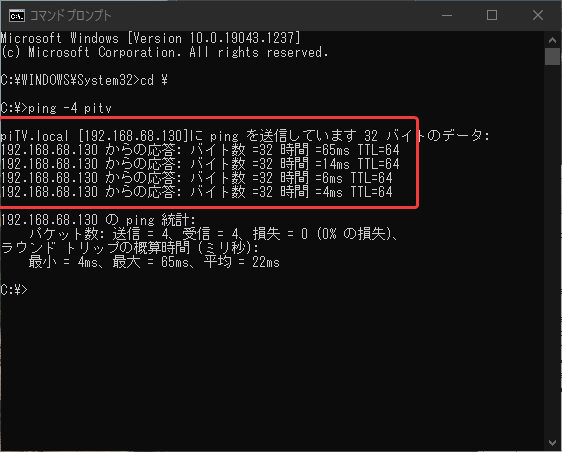
Log In to the Raspberry Pi
Connect to the Raspberry Pi from the host PC over SSH. Recent Windows 10 versions include the ssh command by default, so try connecting to the Raspberry Pi from Command Prompt. The default username is pi. Enter the password you specified in the initial settings.
c:>ssh -V
OpenSSH_for_Windows_8.1p1, LibreSSL 3.0.2
c:>ssh pi@piTV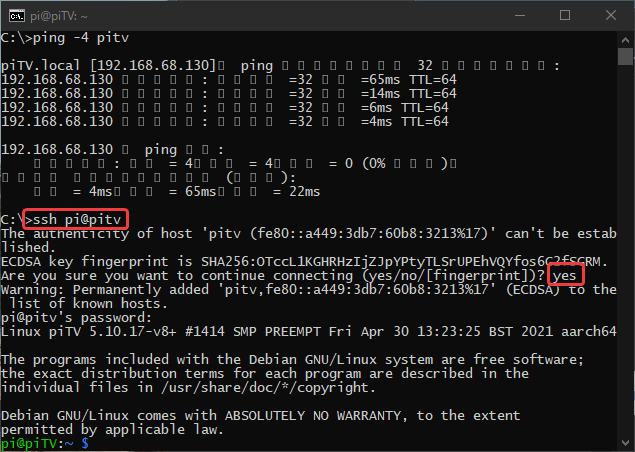
I was able to connect without problems. The time zone is also configured.
pi@piTV:~ $ date
Thu 16 Sep 20:52:08 JST 2021
You need the 64-bit version to use Docker. I hope Raspberry Pi Imager lets us select the 64-bit version soon.
I used to think attaching various devices to a Raspberry Pi was inelegant, but once you use an SSD, you cannot go back to an SD card.