I got a 4 GB memory version of the Raspberry Pi 4, so I tried a headless installation of Ubuntu Server 21.04. For now, I will record the steps from installing the OS to logging in by SSH from the host PC.
Environment Tested
Raspberry Pi 4, 4 GB memory
Transcend microSD 128GB
Write the Ubuntu Image to the SD Card
Prepare the environment on the host PC.
Write Ubuntu to the SD card from Windows, Mac, or Linux.
The steps below are what I tried on Windows.
- Download Raspberry Pi Imager.
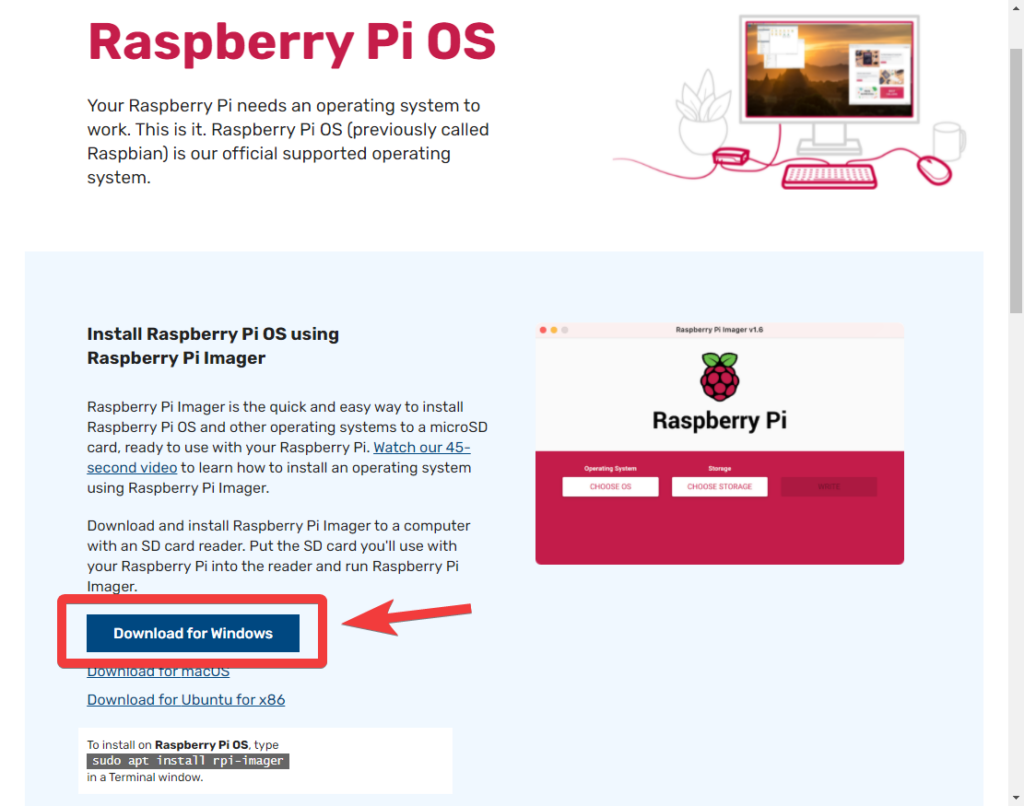
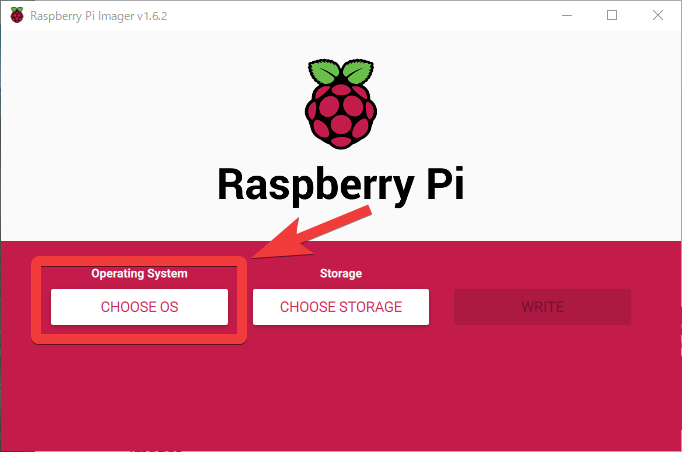
2. Start Raspberry Pi Imager. Click "CHOOSE OS".
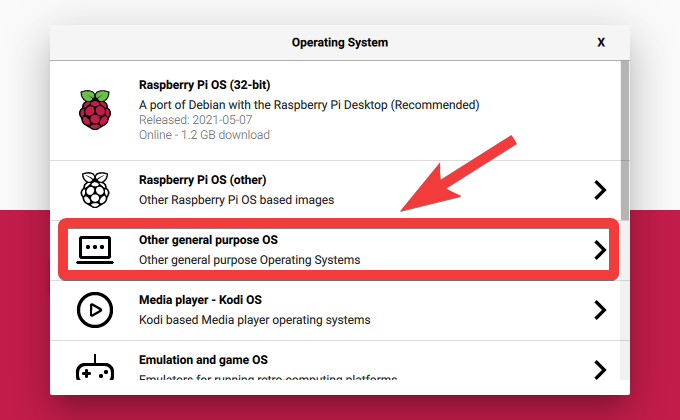
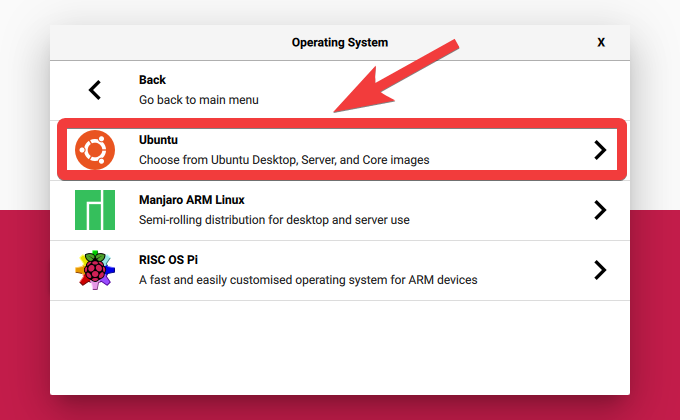
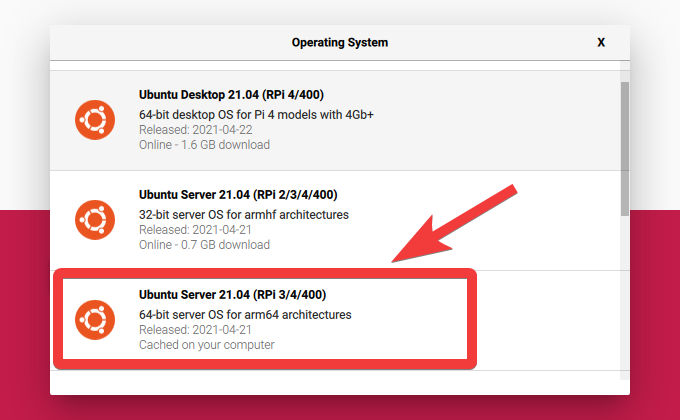
3. Click in this order: "Other general purpose OS" → "Ubuntu" → "Ubuntu Server 21.04 (RPi 3/4/400) 64-bit".
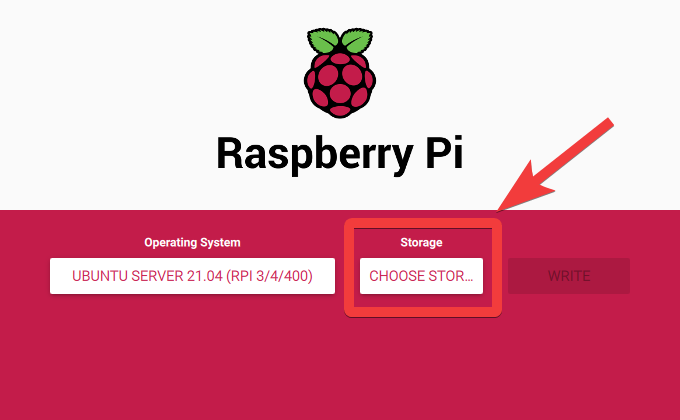
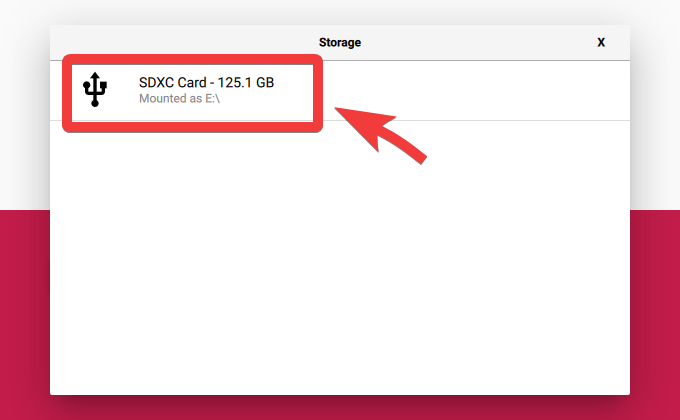
4. Insert the SD card into the host PC, click "CHOOSE STORAGE", and select the SD card prepared for the Raspberry Pi.
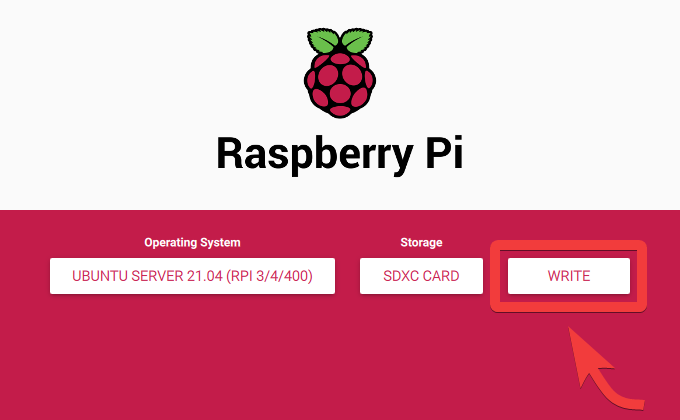
5. Write the image to the SD card. Click "WRITE"; when the confirmation to erase the SD card appears, click "YES" to run it.
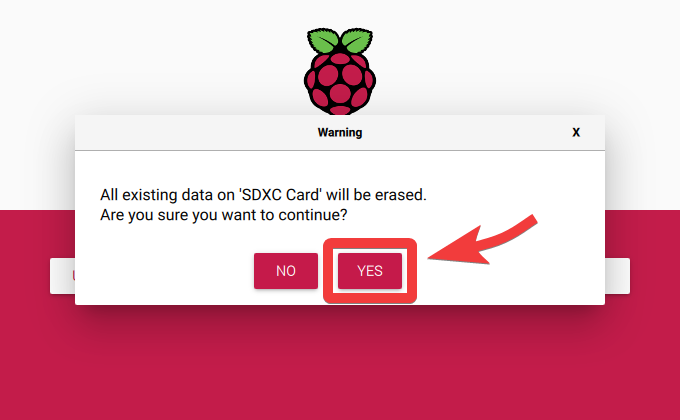
It downloads the OS image and writes it for you. Wait a while until it finishes. If writing takes more than 10 minutes, the SD card specs are probably too low, so it would be better to prepare a new one. With the Transcend microSD (UHS-I U3 V30 A1 Class 10) I used this time, it finished in around five minutes including verification. The A2 type seems to be faster, so people who want speed may want to choose that.
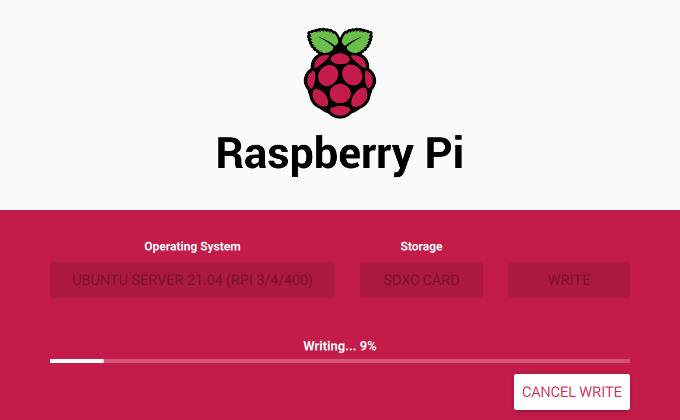
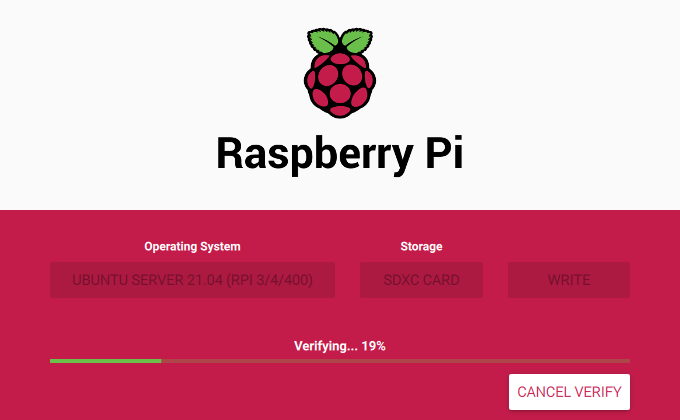
When verification, meaning the write check, finishes successfully, the SD card containing Ubuntu for the Raspberry Pi is complete.
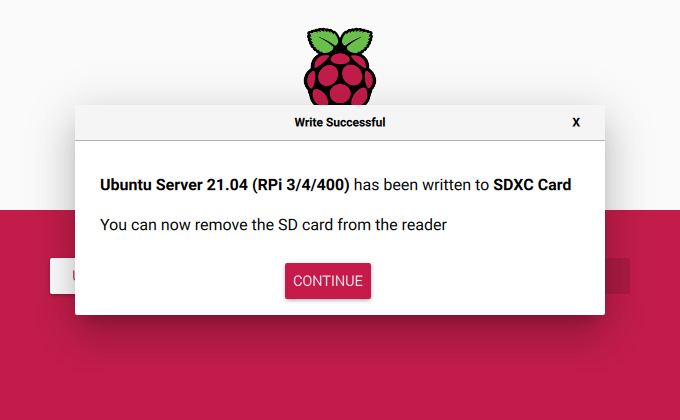
If a message like the following is displayed, it is complete. Remove the SD card from the PC.
Configure Initial Settings Before Boot
This is a headless installation, meaning no keyboard or monitor will be connected, so initial settings are needed so Ubuntu automatically connects to the network after boot. Choose whichever is easier for you, wired or Wi-Fi.
The following procedure connects to Wi-Fi after boot.
- Insert the SD card with Ubuntu written to it back into the host PC.
There is a partition namedsystem-boot. Open thenetwork-configfile inside it with Notepad or another text editor.
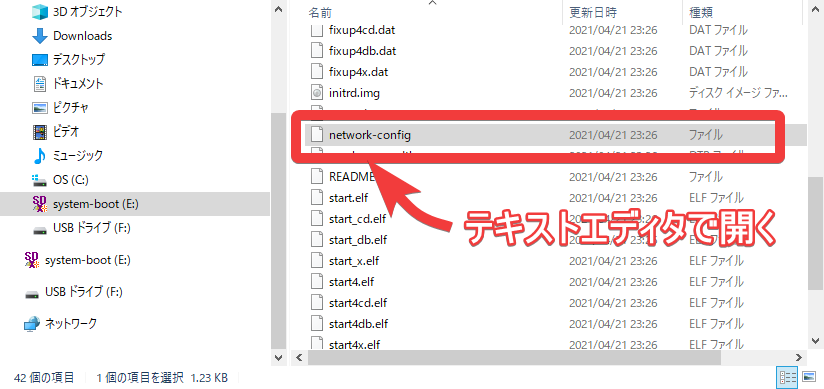
This time, configure it to connect to Wi-Fi when it boots. Edit the section below wifis:.
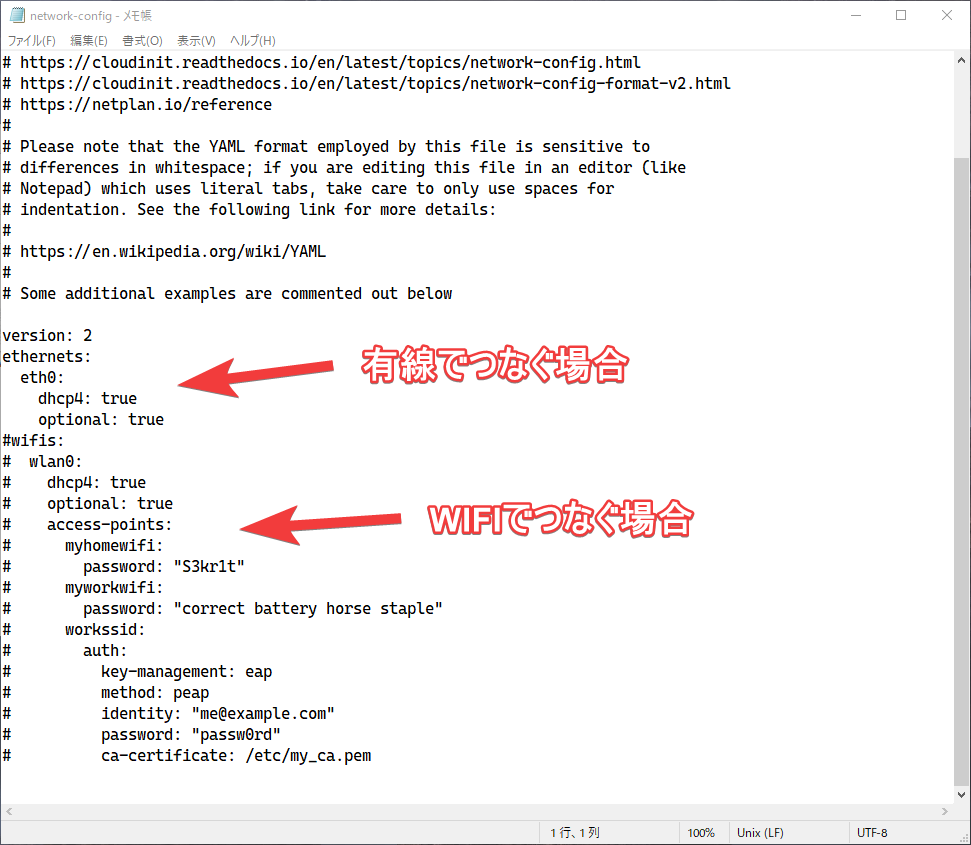
If you can determine the IP address assigned to the Raspberry Pi by DHCP from your Wi-Fi router's admin screen or similar, it is enough to set the myhomewifi: part to your home Wi-Fi SSID and the password: part to the Wi-Fi password.
wifis:
  wlan0:
    dhcp4: true
    optional: true
    access-points:
      homenossid:
        password: "homewifinopassword"
If you want to use a static IP address, specify the IP address (adresses), default gateway (gateway4), and DNS servers (nameservers) as shown below. Set each value according to your network environment.
wifis:
  wlan0:
    dhcp4: false
    optional: true
    addresses:
    - 192.168.68.81/24
    gateway4: 192.168.68.1
    nameservers:
        addresses:
        - 192.168.68.1
        - 8.8.8.8
    access-points:
      homenossid:
        password: "homewifinopassword"
After editing, save it as-is.
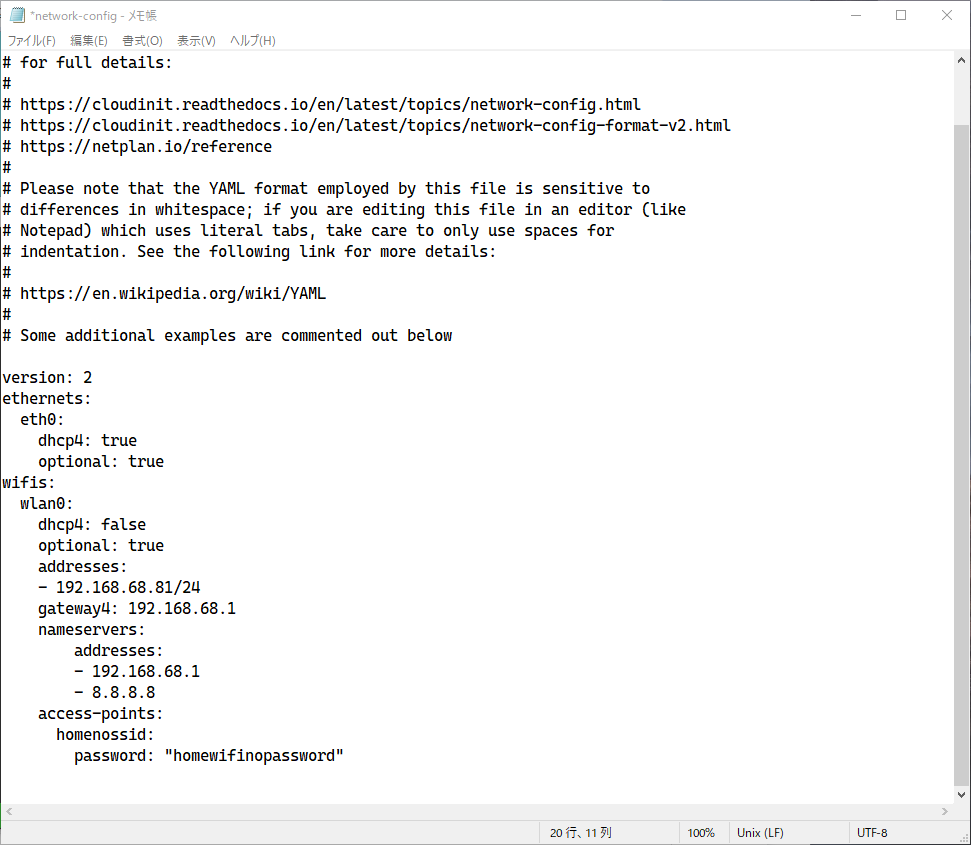
Example settings when using a static IP.
version: 2
ethernets:
  eth0:
    dhcp4: true
    optional: true
wifis:
  wlan0:
    dhcp4: false
    optional: true
    addresses:
    - 192.168.68.81/24
    gateway4: 192.168.68.1
    nameservers:
        addresses:
        - 192.168.68.1
        - 8.8.8.8
    access-points:
      homenossid:
        password: "homewifinopassword"
Configure Additional Settings
By editing the user-data file in the same folder, you can configure many different settings.
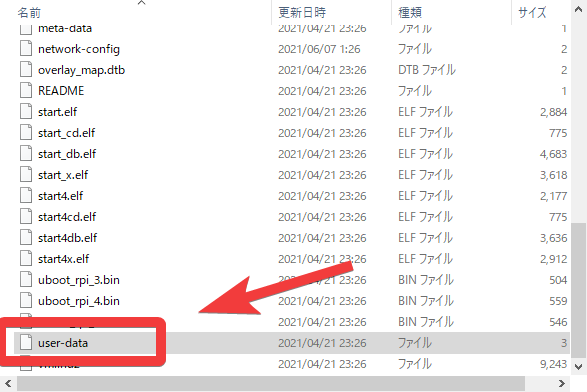
Open and edit this with Notepad too.
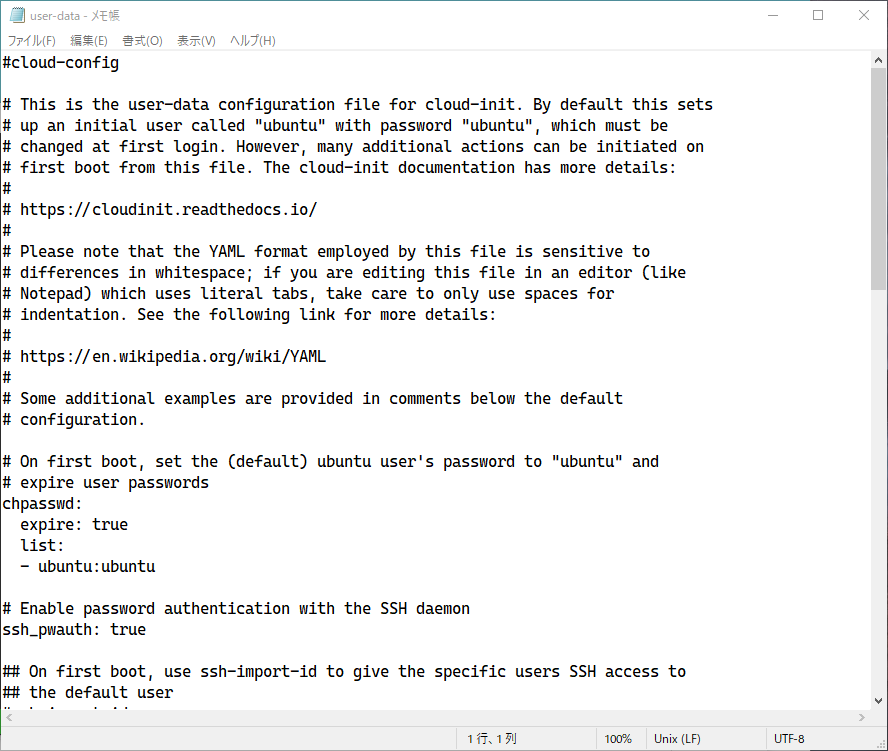
Edit the settings in each section as needed.
# 初回ログイン時にubuntuユーザのパスワードを変更するかどうか。初期パスワードの設定。
# On first boot, set the (default) ubuntu user's password to "ubuntu" and
# expire user passwords
chpasswd:
  expire: true
  list:
  - ubuntu:ubuntu
# SSHでパスワード認証を許可するかどうか。許可しない場合は、ssh_import_id や ssh_authorized_keys を設定し、公開鍵をインポートする必要がある。
# Enable password authentication with the SSH daemon
ssh_pwauth: true
On first boot, use ssh-import-id to give the specific users SSH access to
the default user
#ssh_import_id:
#- lp:my_launchpad_username
#- gh:my_github_username
#ssh_authorized_keys:
#- <ssh pub key 1>
#- <ssh pub key 2>
# グループを追加したい場合はここで設定する。
## Add users and groups to the system, and import keys with the ssh-import-id
## utility
#groups:
#- robot: [robot]
#- robotics: [robot]
#- pi
#
#
# ユーザーを追加する。- defaultの行をコメントアウトしてユーザを追加すると、ubuntu ユーザを作成しないようにできる。
#users:
#- default
#- name: robot
#  gecos: Mr. Robot
#  primary_group: robot
#  groups: users
#  ssh_import_id: foobar
#  lock_passwd: false
#  passwd: $5$hkui88$nvZgIle31cNpryjRfO9uArF7DYiBcWEnjqq7L1AQNN3
# パッケージのアップデートと起動時に追加したいパッケージを設定する
## Update apt database and upgrade packages on first boot
package_update: true
package_upgrade: true
## Install additional packages on first boot
#packages:
#- pwgen
#- pastebinit
#- [libpython2.7, 2.7.3-0ubuntu3.1]# 作成したいファイルがある場合はこのような感じで記載しておく。
## Write arbitrary files to the file-system (including binaries!)
#write_files:
#- path: /etc/default/keyboard
# content: |
# # KEYBOARD configuration file
# # Consult the keyboard(5) manual page.
# XKBMODEL="pc105"
# XKBLAYOUT="gb"
# XKBVARIANT=""
# XKBOPTIONS="ctrl: nocaps"
# permissions: '0644'
# owner: root:root
#- encoding: gzip
# path: /usr/bin/hello
# content: !!binary |
# H4sIAIDb/U8C/1NW1E/KzNMvzuBKTc7IV8hIzcnJVyjPL8pJ4QIA6N+MVxsAAAA=
# owner: root:root
# permissions: '0755'# 起動時に実行したいコマンドがあれば書いておく
## Run arbitrary commands at rc.local like time
#runcmd:
#- [ ls, -l, / ]
#- [ sh, -xc, "echo $(date) ': hello world!'" ]
#- [ wget, "http://ubuntu.com", -O, /run/mydir/index.html ]Add your own settings as well.
# ホスト名(※再起動後に有効になる。初回起動時にはセットされない。)
hostname: ubuntuserver
# タイムゾーン、ロケールの設定
timezone: “Asia/Tokyo”
locale: “ja_JP.UTF-8”
サーバー用途ではSDカードがすぐ壊れるので、RAMDISKを使って対策をする
/tmp,/var/tmp,/var/logをRAMDISK化する
mounts:
- [ tmpfs, /tmp, tmpfs, “defaults,size=256m”, “0”, “0” ]
- [ tmpfs, /var/tmp, tmpfs, “defaults,size=256m”, “0”, “0” ]
- [ tmpfs, /var/log, tmpfs, “defaults,size=128m”, “0”, “0” ]
If there are other items you want to configure, it is good to search the cloud-init documentation site.
https://cloudinit.readthedocs.io/en/latest/topics/examples.html
This time I kept the settings simple.
#cloud-config の設定例
On first boot, set the (default) ubuntu user’s password to “ubuntu” and
expire user passwords
chpasswd:
expire: false
list:
- ubuntu:ubuntu
Enable password authentication with the SSH daemon
ssh_pwauth: true
Update apt database and upgrade packages on first boot
package_update: true
package_upgrade: true
Install additional packages on first boot
packages:
- avahi-daemon
ホスト名の設定
hostname: ubuntuserver
# タイムゾーン、ロケールの設定
timezone: “Asia/Tokyo”
locale: “ja_JP.UTF-8”
サーバー用途ではSDカードがすぐ壊れるので、RAMDISKを使って対策をする
/tmp,/var/tmp,/var/logをRAMDISK化する
mounts:
- [ tmpfs, /tmp, tmpfs, “defaults,size=256m”, “0”, “0” ]
- [ tmpfs, /var/tmp, tmpfs, “defaults,size=256m”, “0”, “0” ]
- [ tmpfs, /var/log, tmpfs, “defaults,size=128m”, “0”, “0” ]
When the settings are finished, save the file and remove the SD card from the host PC.
Boot the Raspberry Pi
Insert the configured SD card and turn on the Raspberry Pi. I want a cooler-looking case...

Use ping or similar tools while waiting for the Raspberry Pi to connect to the network.
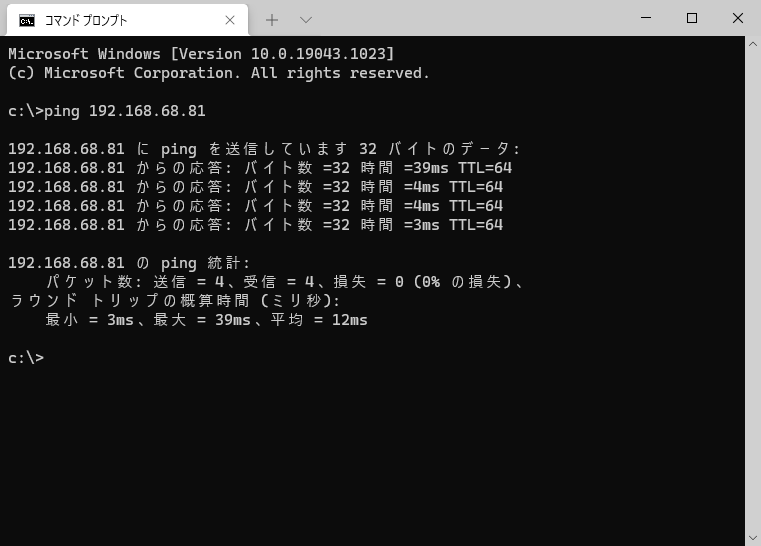
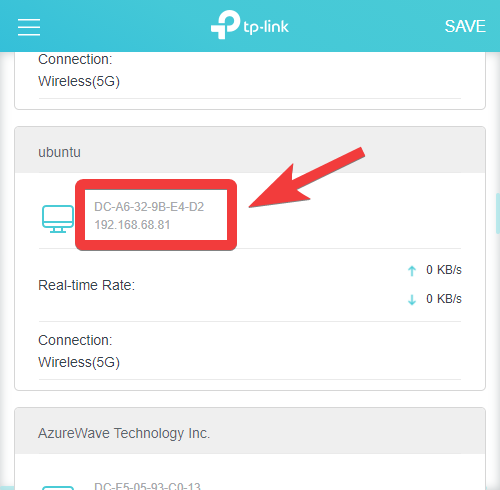
I was also able to confirm the connection from the router settings screen.
Connect to the Raspberry Pi from the host PC by SSH. Recent Windows 10 installations include the ssh command by default, so try connecting to the Raspberry Pi from Command Prompt.
c:\>ssh -V
OpenSSH_for_Windows_8.1p1, LibreSSL 3.0.2
c:\>ssh ubuntu@UBUNTU_NO_IPADDR
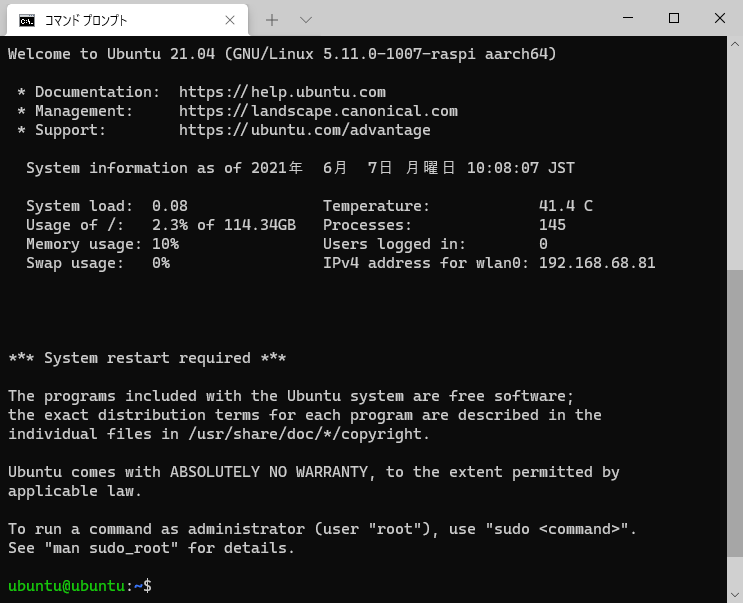
The locale and RAM disk settings for the TEMP areas have also been applied automatically.
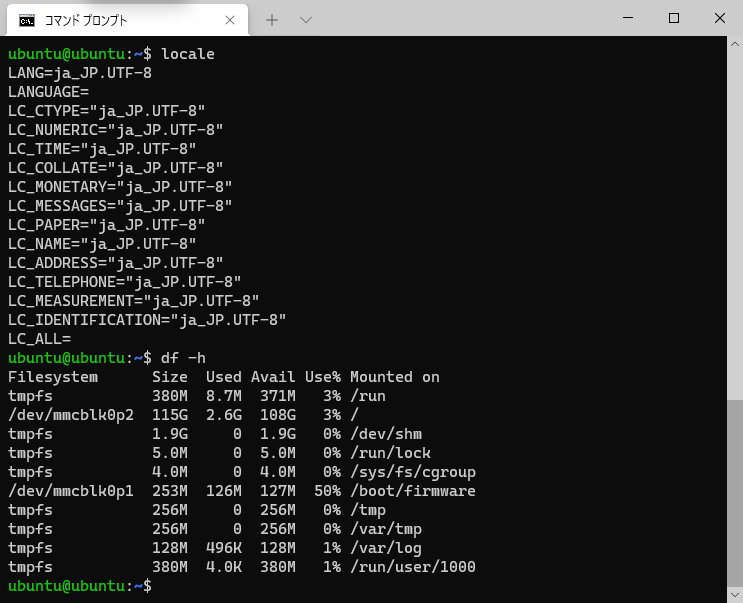
A restart request was displayed at boot, so reboot it as well.
ubuntu@ubuntu:~$ sudo reboot
Connection to 192.168.68.81 closed by remote host.
Connection to 192.168.68.81 closed.
After rebooting, I was able to access it using the configured hostname.
c:\>ping -4 ubuntuserver.local
Pinging ubuntuserver.local [192.168.68.81] with 32 bytes of data:
Reply from 192.168.68.81: bytes=32 time=3ms TTL=64
Reply from 192.168.68.81: bytes=32 time=4ms TTL=64
Reply from 192.168.68.81: bytes=32 time=4ms TTL=64
Reply from 192.168.68.81: bytes=32 time=4ms TTL=64

The official Pi OS is 32-bit, so sometimes I could not use the latest container images or packages, and there were small inconveniences. Because of that, lately I have been using the easier-to-work-with 64-bit Ubuntu. 🐩
Update: It looks like Pi OS also has a 64-bit version, so I would like to try it.
If you are not using it as a desktop, you do not need a keyboard or display. 🍣🐟🐤