This time, I use Docker to start a mail server and handle the various settings around it.
Overview
I use Postfix and Dovecot for my home mail server, but when installed as native packages, the initial configuration is complicated. When rebuilding the server or moving it to another PC, I completely forget what was configured and how. On top of that, I also need to configure other tools such as spam countermeasures and Fail2Ban, so it is a real hassle. This time the goal is an easy installation using Docker.
The Raspberry Pi set up here already has Ubuntu installed, is prepared so ports can be exposed externally, has its domain configured, and has already obtained a Let's Encrypt SSL certificate.
Related Past Articles
- Connect with PPPoE on Ubuntu 19.10 and open ports.
- [Raspberry Pi 4] Headless installation of Ubuntu 20.10. How to install without a keyboard or display
- [Raspberry Pi 4] Install Nginx and obtain an SSL server certificate from Let's Encrypt
- [Raspberry Pi 4] Build a mail server with Docker. ★ You are here
- [Raspberry Pi 4] Run WordPress with Docker.
Environment Tested
Raspberry Pi4 (RAM 8GB)
Ubuntu 20.10 (arm64)
$ docker --version
Docker version 20.10.2, build 2291f61
$ docker-compose --version
docker-compose version 1.25.0, build unknown
I used the docker-mailserver Docker image.
The following ports are used:
25 SMTP
587 Submission
993 IMAPS
About docker-mailserver
I use docker-mailserver to build the mail server.
A fullstack but simple mail server (SMTP, IMAP, LDAP, Antispam, Antivirus, etc.). Only configuration files, no SQL database. Keep it simple and versioned. Easy to deploy and upgrade.
Why this image was created.
"Simple, versionable configuration, and easy upgrades" was exactly what I wanted.
The recommended specs for docker-mailserver look like this.
Recommended Environment Specs
- 1 Core
- 1-2GB RAM
- Swap enabled for the container
Minimum Specs:
- 1 vCore
- 512MB RAM
The required resources probably change depending on the types and number of services you run. A Raspberry Pi 4 should be fine for now.
Build Procedure
Now I will build it with Docker.
Fetch docker-mailserver
First, clone the GitHub repository onto the Raspberry Pi.
$ cd ~
$ git clone https://github.com/docker-mailserver/docker-mailserver.git
Basic Settings
After cloning, you get docker-compose.yml and various configuration files, so add the basic information for the mail server.
Copy compose.env to create the .env file.
$ cd ~/docker-mailserver
$ cp compose.env .env
In .env, write the container hostname, domain name, and container name. DOMAINNAME is the mail domain used by the mail server. I think the hostname and container name can be anything. Leave SELINUX_LABEL= empty.
Example .env Settings
# –––––––––––––––––––––––––––––––––––––––––––––––
# ––– Docker Compose Settings Variables –––––––––
# –––––––––––––––––––––––––––––––––––––––––––––––
HOSTNAME=mail           # コンテナのホスト名
DOMAINNAME=nosubject.io # メールサーバのドメイン名
CONTAINER_NAME=mail     # コンテナの名前
–––––––––––––––––––––––––––––––––––––––––––––––
––– SELinux Compose File Settings Variables –––
––– options: empty, ‘-z’ or ‘-Z’  –––––––––––––
–––––––––––––––––––––––––––––––––––––––––––––––
SELINUX_LABEL=
Configure the mail server in mailserver.env. By changing only this file, you can enable various services, not just Postfix and Dovecot. There are so many that I cannot fully use them all, but for now I will configure the minimum necessary settings.
Example mailserver.env Settings (only the changed parts are excerpted)
# ポストマスターのメールアドレス
POSTMASTER_ADDRESS=xxxx@nosubject.io
スプーフィングを防止する
SPOOF_PROTECTION=1
Fail2Banを有効にする
ENABLE_FAIL2BAN=1
SSLにLet’s Encryptを使う
SSL_TYPE=letsencrypt
メッセージサイズの制限 デフォルトの10MBから20MBに変更。
POSTFIX_MESSAGE_SIZE_LIMIT=20480000
OP25B対策でRELAY HOSTを設定する。
RELAY_HOST=smtp.gmobb.jp
RELAY_PORT=587
RELAY_USER=xxxxxxxxxx@xxxx.gmobb.jp
RELAY_PASSWORD=XXXXXXX
For OP25B countermeasures, I set RELAY_HOST and send through my provider's SMTP server.
Diff
diff --git a/mailserver.env b/mailserver.env
index 61f1f85..672c2bd 100644
--- a/mailserver.env
+++ b/mailserver.env
@@ -16,7 +16,7 @@ ONE_DIR=0
empty => postmaster@domain.com
=> Specify the postmaster address
-POSTMASTER_ADDRESS=
+POSTMASTER_ADDRESS=postmaster@nosubject.io
Set different options for mynetworks option (can be overwrite in postfix-main.cf)
WARNING: Adding the docker network’s gateway to the list of trusted hosts, e.g. using the network or
@@ -47,7 +47,7 @@ TLS_LEVEL=
See also https://en.wikipedia.org/wiki/Email_spoofing
1 => (recommended) Mail spoofing denied. Each user may only send with his own or his alias addresses.
Addresses with extension delimiters(http://www.postfix.org/postconf.5.html#recipient_delimiter) are not able to send messages.
-SPOOF_PROTECTION=
+SPOOF_PROTECTION=1
Enables the Sender Rewriting Scheme. SRS is needed if your mail server acts as forwarder. See [postsrsd](https://github.com/roehling/postsrsd/blob/master/README.md#sender
-rewriting-scheme-crash-course) for further explanation.
- 0 => Disabled
@@ -63,7 +63,7 @@ ENABLE_CLAMAV=0
cap_add:
- NET_ADMIN
Otherwise, iptables won’t be able to ban IPs.
-ENABLE_FAIL2BAN=0
+ENABLE_FAIL2BAN=1
1 => Enables Managesieve on port 4190
empty => disables Managesieve
@@ -85,7 +85,7 @@ SMTP_ONLY=
custom => Enables custom certificates
manual => Let’s you manually specify locations of your SSL certificates for non-standard cases
self-signed => Enables self-signed certificates
-SSL_TYPE=
+SSL_TYPE=letsencrypt
Set how many days a virusmail will stay on the server before being deleted
empty => 7 days
@@ -113,7 +113,7 @@ POSTFIX_MAILBOX_SIZE_LIMIT=
Set the message size limit for all users. If set to zero, the size will be unlimited (not recommended!)

empty => 10240000 (~10 MB)
-POSTFIX_MESSAGE_SIZE_LIMIT=
+POSTFIX_MESSAGE_SIZE_LIMIT=20480000
Enables regular pflogsumm mail reports.
This is a new option. The old REPORT options are still supported for backwards compatibility. If this is not set and reports are enabled with the old options, logrotate will be used.
@@ -417,16 +417,16 @@ DEFAULT_RELAY_HOST=

empty => don’t configure relay host
default host to relay mail through
-RELAY_HOST=
+RELAY_HOST=smtp.gmobb.jp
empty => 25
default port to relay mail
-RELAY_PORT=25
+RELAY_PORT=587
empty => no default
default relay username (if no specific entry exists in postfix-sasl-password.cf)
-RELAY_USER=
+RELAY_USER=xxxxxxxxxx@xxxx.gmobb.jp
empty => no default
password for default relay user
-RELAY_PASSWORD=
+RELAY_PASSWORD=XXXXXXX
Pre-Startup Settings, Part 2
Modify docker-compose.yml.
Because this is a Raspberry Pi, if log files are not written to a RAM disk (tmpfs), the SD card will wear out quickly. I configured the log files inside the container to be written to /var/log/mailserver (tmpfs) on the host side. I also mount the Let's Encrypt certificates from the host side.
Example ./docker-compose.yml Settings
version: '3'
services:
mailserver:
image: docker.io/mailserver/docker-mailserver:latest
hostname: ${HOSTNAME}
domainname: ${DOMAINNAME}
container_name: ${CONTAINER_NAME}
env_file: mailserver.env
ports:
- “25:25”
# - “143:143” # 追記:外部に公開が不要なポートは外しておくこと。
# LAN内だけに公開する場合は、“127.0.0.1:143:143” とする必要がある。
- “587:587”
- “993:993”
volumes:
- maildata:/var/mail
- mailstate:/var/mail-state
# ログの出力先をホスト側のtmpfsに変更
# - maillogs:/var/log/mail
- /var/log/mailserver/mail:/var/log/mail/
- /var/log/mailserver/supervisor/:/var/log/supervisor/
- ./config/:/tmp/docker-mailserver/
# ホスト側にあるletsencryptの場所を指定する
- /etc/letsencrypt/:/etc/letsencrypt/
cap_add: [ “NET_ADMIN”, “SYS_PTRACE” ]
restart: always
volumes:
maildata:
mailstate:
maillogs:
Change the Fail2Ban log settings so they also write to tmpfs. Modify the file under ./config/.
./config/fail2ban-fail2ban.cf
# ログの出力先を指定
logtarget = /var/log/mail/fail2ban.log
Create the folder on the host side. It may be created automatically when the volume is mounted, but I have not verified that.
# コンテナがログを出力するためのフォルダを作成
$ sudo mkdir /var/log/mailserver
Note: folders and files on tmpfs disappear when the Raspberry Pi is rebooted, so be careful.
Create an Account and Start the Container
Use ./setup.sh to create one account, then start the container. You may be able to create the account later too; I do not remember.
$ ./setup.sh email add xxxx@nosubject.io xxxxxxx
$ docker-compose up -d
With setup.sh, you can add users and create aliases. This usability is simple and really convenient. See the setup.sh guide for how to use it.
./setup.sh alias add hoge@nosubject.io xxxx@nosubject.io
./setup.sh alias add moge@nosubject.io xxxx@nosubject.io
./setup.sh alias add fuga@nosubject.io xxxx@nosubject.io
The users and aliases you create are recorded in the following files.
./config/postfix-accounts.cf
./config/postfix-virtual.cf
If you keep these config files, even if you delete the container with docker-compose down, it will recreate the same setup when you run it again with up. Very nice.
After the Docker container starts, the port state looks like this.
$ netstat -ltn
Active Internet connections (only servers)
Proto Recv-Q Send-Q Local Address           Foreign Address         State
tcp        0      0 0.0.0.0:993             0.0.0.0:*               LISTEN
tcp        0      0 0.0.0.0:587             0.0.0.0:*               LISTEN
tcp        0      0 0.0.0.0:143             0.0.0.0:*               LISTEN
tcp        0      0 0.0.0.0:80              0.0.0.0:*               LISTEN
tcp        0      0 0.0.0.0:8080            0.0.0.0:*               LISTEN
tcp        0      0 127.0.0.53:53           0.0.0.0:*               LISTEN
tcp        0      0 0.0.0.0:22              0.0.0.0:*               LISTEN
tcp        0      0 0.0.0.0:25              0.0.0.0:*               LISTEN
tcp        0      0 0.0.0.0:443             0.0.0.0:*               LISTEN
tcp6       0      0 :::80                   :::*                    LISTEN
tcp6       0      0 :::22                   :::*                    LISTEN
tcp6       0      0 :::443                  :::*                    LISTEN
Firewall Settings
Open ports 25 (smtp), 587 (submission), and 993 (imaps). ⚠143 (imap) is not used, so do not open it.
$ sudo ufw limit smtp
$ sudo ufw limit submission
$ sudo ufw limit imaps
⚠Update: I later discovered that port 143 (imap) was open, so I added more configuration. It was the same situation as in the article below. It was very helpful. Thank you.
Reference: A story about a public host with terrible security
https://www.ryotosaito.com/blog/?p=492
This completes the mail server build.
Once you configure a mail client, you will be able to send and receive mail from outside as well.
Bonus
Relay Check
Check whether it has become a spam relay using Open Relay check sites.
https://mxtoolbox.com/SuperTool.aspx
If it is not an Open Relay, it is OK. If Fail2Ban is running, the check site may get banned, so be careful. It does confirm that Fail2Ban is working properly, though.
You can enter the container using setup.sh.
$ cd ~/docker-mailserver
$ ./setup.sh debug login
Client Settings
The SMTP/IMAPS username is the full email address including the domain name (xxxx@nosubject.io).
For the password, set the one you configured with setup.sh.
In the standard iPhone Mail app:
Incoming settings:
Host name: nosubject.io
User name: xxxx@nosubject.io
Password: xxxx
Use SSL: ON
Server port: 993
Outgoing settings:
Host name, user, and password: same as above
Use SSL: ON
Authentication: Password
Server port: 587
You can connect with these settings.
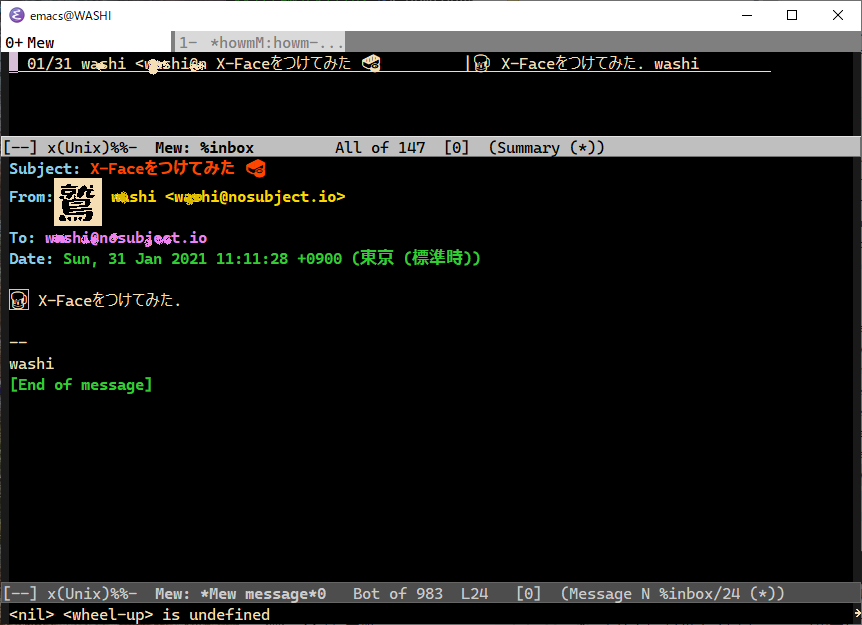
I was able to send and receive mail with Emacs Mew too. 😂
Summary
This was an introduction showing how easy it is to build a mail server with docker-mailserver. I am grateful that someone created such a useful tool.

Maybe I should also write down the Mew settings as notes.