A memo from setting up a home server on a Raspberry Pi.
This covers installing Ubuntu on the Raspberry Pi and logging in from a PC over SSH.
Update: I wrote the memo from trying this on a Raspberry Pi 4 here.[Raspberry Pi 4] Headless Install of Ubuntu 20.10: How to Install Without a Keyboard or Display

The method I used on the Raspberry Pi 4 is easier, so I recommend that one.
Test Environment
Raspberry Pi 3
Ubuntu 18.04.04 LTS 32-bit
16GB Transcend microSD card
Download and Install Ubuntu
Download the OS image from https://ubuntu.com/download/raspberry-pi . Since the Raspberry Pi 3 has little memory, the benefit of choosing 64-bit is limited, so I downloaded 32-bit this time.
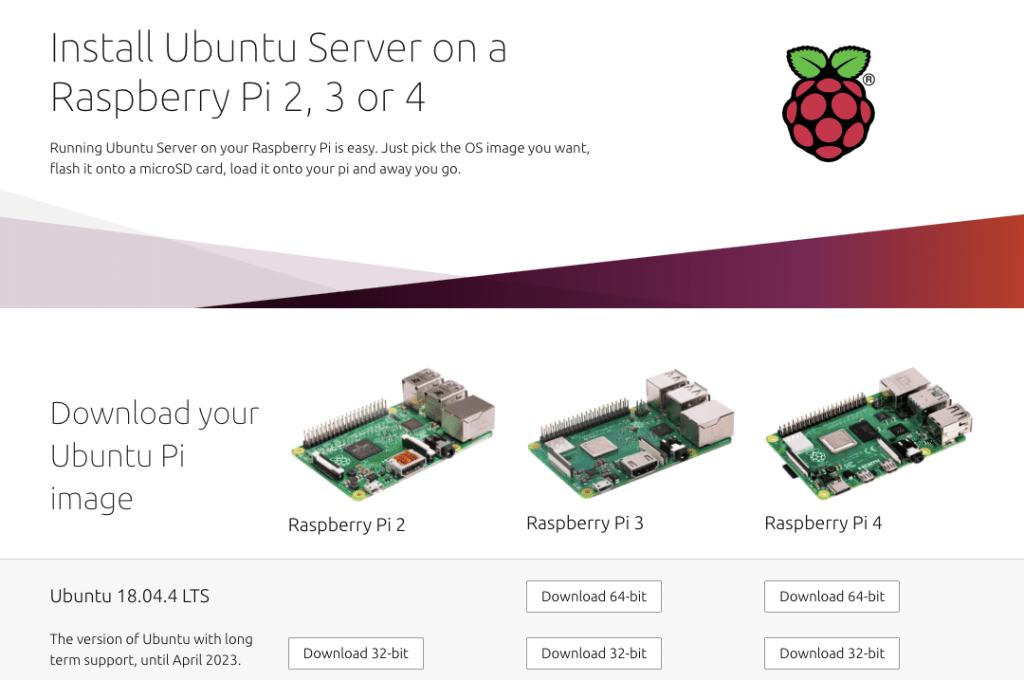
Extract the downloaded ubuntu-18.04.4-preinstalled-server-armhf+raspi3.img.xz file (7Zip on Windows, gunzip on macOS) and write it to the SD card.
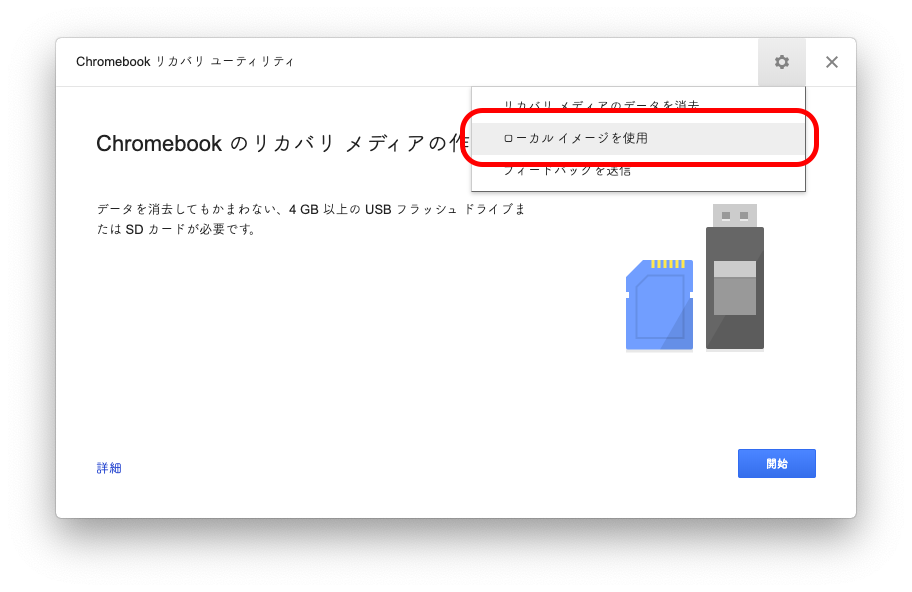
The official site describes how to write it on Ubuntu, Windows, and macOS. The procedure using diskutil or dd is a little troublesome, so in my case I rename the extracted img extension to bin and write it to the SD card with the Chromebook Recovery Utility.
$ gunzip ubuntu-18.04.4-preinstalled-server-armhf+raspi3.img.xz
$ mv ubuntu-18.04.4-preinstalled-server-armhf+raspi3.img ubuntu-18.04.4-preinstalled-server-armhf+raspi3.bin
You can select a local image from the gear button in the upper right, so select the extracted and renamed Raspberry Pi image.
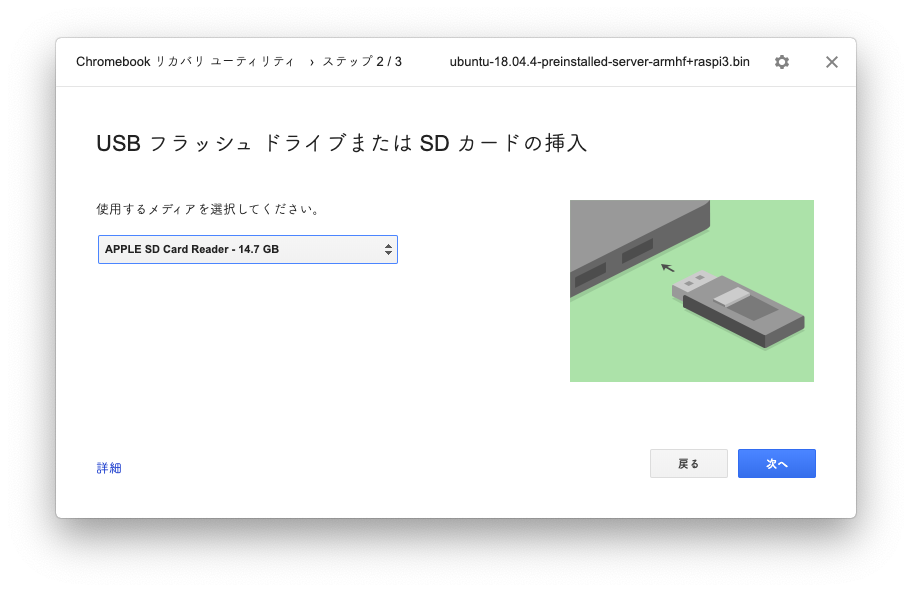
Select the SD card slot to write to.
Press the "Create now" button to start writing. (Administrator privileges are required.)
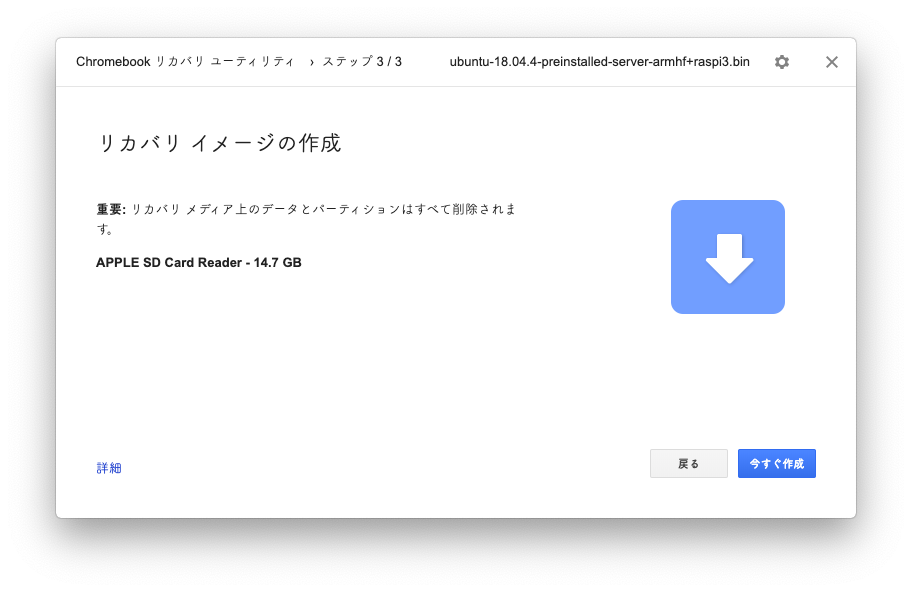
It finishes in about three minutes.
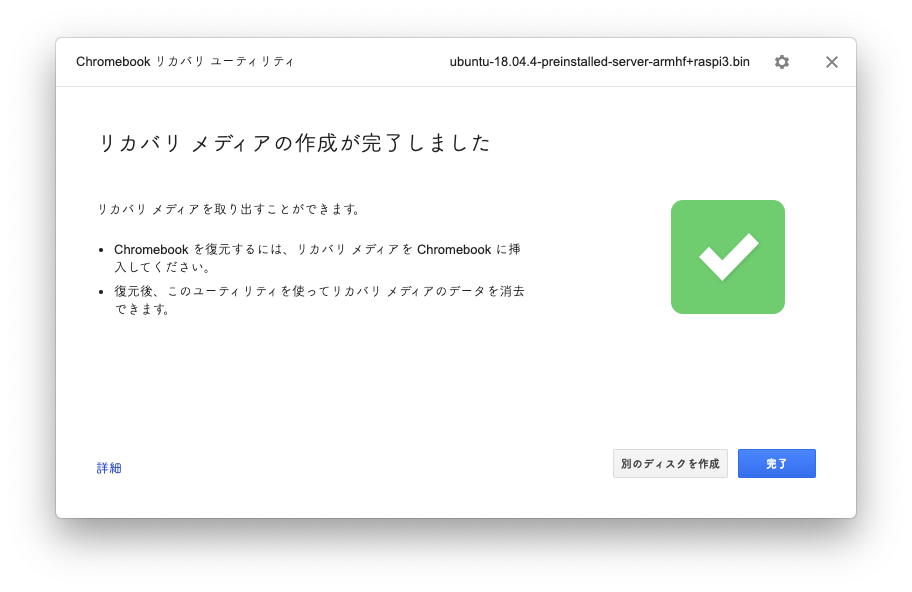
Writing to the SD card is easy on both Mac and Windows if you use the Chromebook Recovery Utility. Since I will only connect power to the Raspberry Pi, I will do a little more setup on the PC side.
If you remove the SD card and insert it into the Raspberry Pi, Ubuntu will boot.
However, this time there is no keyboard or display on the Raspberry Pi, so before booting Ubuntu, configure Wi-Fi with a static IP so that SSH connections are possible immediately after boot.
Configure the Network Before Booting
On the SD card's system-boot partition, there is a file called network-config, and you can configure network settings for startup there.
Open it in an editor and set the Wi-Fi settings: SSID, password, static IP, and default gateway. If using wired LAN, I think setting a static IP for eth0 is enough.
# This file contains a netplan-compatible configuration which cloud-init
# will apply on first-boot. Please refer to the cloud-init documentation and
# the netplan reference for full details:
#
# https://cloudinit.readthedocs.io/
# https://netplan.io/reference
#
# Some additional examples are commented out below
version: 2
ethernets:
eth0:
dhcp4: true
optional: true
wifis:
wlan0:
dhcp4: false
gateway4: 192.168.11.254
nameservers:
addresses:
- 192.168.11.254
addresses:
- 192.168.11.3/24
optional: false
access-points:
HomeSSID-012345:
password: “HomePassword012345”
#wifis:
wlan0:
dhcp4: true
optional: true
access-points:
homessid:
password: “S3kr1t”
myotherlan:
password: “correct battery horse staple”
workssid:
auth:
key-management: eap
method: peap
identity: “me@example.com”
password: “passw0rd”
ca-certificate: /etc/my_ca.pem
Memo:
Wi-Fi did not connect unless wlan0 was set to optional: false. Maybe it is a timing issue?
User Settings
If you edit the file called user-data on the SD card, you can configure users and similar settings. I wanted to delete the ubuntu user and use a different user ID, but it does not seem possible here. First I will log in as the ubuntu user, then rename the ubuntu user afterward. I have not tried it, but it looks like users can be added in the users: section and packages can be added in the packages: section.
#cloud-config
This is the user-data configuration file for cloud-init. By default this sets
up an initial user called “ubuntu” with password “ubuntu”, which must be
changed at first login. However, many additional actions can be initiated on
first boot from this file. The cloud-init documentation has more details:
https://cloudinit.readthedocs.io/
Some additional examples are provided in comments below the default
configuration.
Enable password authentication with the SSH daemon
ssh_pwauth: true
On first boot, set the (default) ubuntu user’s password to “ubuntu” and
expire user passwords
どうせ後で変えるから初回ログイン時のパスワード変更はしない
chpasswd:
expire: false
list:
- ubuntu:ubuntu
Add users and groups to the system, and import keys with the ssh-import-id
utility
#groups:
#- robot: [robot]
#- robotics: [robot]
#- pi
#users:
#- default
#- name: robot
gecos: Mr. Robot
primary_group: robot
groups: users
ssh_import_id: foobar
lock_passwd: false
passwd: $5$hkui88$nvZgIle31cNpryjRfO9uArF7DYiBcWEnjqq7L1AQNN3
Update apt database and upgrade packages on first boot
#package_update: true
#package_upgrade: true
Install additional packages on first boot
#packages:
#- pwgen
#- pastebinit
#- [libpython2.7, 2.7.3-0ubuntu3.1]
Write arbitrary files to the file-system (including binaries!)
#write_files:
#- path: /etc/default/keyboard
content: |
# KEYBOARD configuration file
# Consult the keyboard(5) manual page.
XKBMODEL=“pc105”
XKBLAYOUT=“gb”
XKBVARIANT=""
XKBOPTIONS=“ctrl: nocaps”
permissions: ‘0644’
owner: root:root
#- encoding: gzip
path: /usr/bin/hello
content: !!binary |
H4sIAIDb/U8C/1NW1E/KzNMvzuBKTc7IV8hIzcnJVyjPL8pJ4QIA6N+MVxsAAAA=
owner: root:root
permissions: ‘0755’
Run arbitrary commands at rc.local like time
#runcmd:
#- [ ls, -l, / ]
#- [ sh, -xc, “echo $(date) ‘: hello world!’” ]
#- [ wget, “http://ubuntu.com”, -O, /run/mydir/index.html ]
Save the settings and boot the Raspberry Pi, and you can connect over SSH. Wait for it to start while running ping from the PC. If you can connect with PuTTY or similar, it is OK.
The Raspberry Pi only needs to be powered on. After that, it is easier to perform the remaining setup from the PC.

If you expose it externally while leaving the user ID as ubuntu, it will definitely become a cracking target. Before publishing it, change the user ID, disable password login, configure fail2ban, and so on.