
Overview
I built a compact, quiet PC. I could have bought Dospara's mini Regulus II AR5, but I already had an OS and SSD on hand, and I was able to buy memory cheaply on Mercari, so this time I bought an ASRock DeskMini X300 barebone kit and assembled it myself.
The photos show the finished build. The front panel is just a little larger than an iPhone 8.


If you want something even more compact and low-power, ASUS's Mini PC PN51 looks good. If you do not want to build one yourself, I think buying a finished mini PC such as Dospara's mini Regulus is probably the way to go.
Parts Used
These are the parts I used this time.
| Item | Name | Amazon Price (as of 2021/07/10) |
| Barebone kit | ASRock DeskMini X300 | ¥17,980 |
| CPU/APU | AMD Ryzen 5 PRO 4650G | ¥32,978 |
| HDD/SSD | Intel SSD 1TB M.2 SSDPEKNW010T8X1 | ¥12,958 |
| Memory | SAMSUNG PC4-25600 DDR4-3200 SO-DIMM 8GBx2 | ¥8,490 x 2 = ¥16,980 |
| OS | Windows 10 Pro retail package | ¥26,063 |
| Add-on | Noctua NH-L9a AM4 CPU cooler | ¥5,640 |
| Add-on | ASRock DeskMini Wi-Fi option kit | ¥3,960 |
| Add-on | ASRock DeskMini USB 2.0 port expansion cable | ¥1,836 |
The prices above are Amazon prices as of 2021/07/10.
With Dospara's "ASRock DeskMini X300 + selectable AMD Ryzen CPU value two-piece set," you can buy the CPU and barebone kit for ¥44,960. A retail Windows package is expensive, so looking for a DSP version or one on Mercari might also be a good idea. This time I used an OS and SSD I already had, and I was able to buy the memory on Mercari for ¥8,000, so the actual out-of-pocket cost was about ¥65,000.
The barebone kit includes a CPU cooler, so you do not need to buy one separately, but I added a Noctua cooler because it improves both quietness and cooling performance. Wi-Fi is also essential in my environment, and the standard USB port count is low, so I added that as well.
If I customized Dospara's mini Regulus II AR5 to a configuration similar to the one above, it would cost around ¥94,000, so I think building it myself was worth it. If you do not have spare parts on hand, buying a finished PC is probably the better deal. It uses the Noctua NH-L9a AM4 CPU cooler from the start and includes Wi-Fi too.
Assembly
Now I will assemble it step by step.
Open the Case and Remove the Motherboard
Remove the four screws on the back panel, then pull the tab at the bottom and the motherboard comes out. The case front panel and motherboard are connected by a cable in one place, so pull it out carefully.

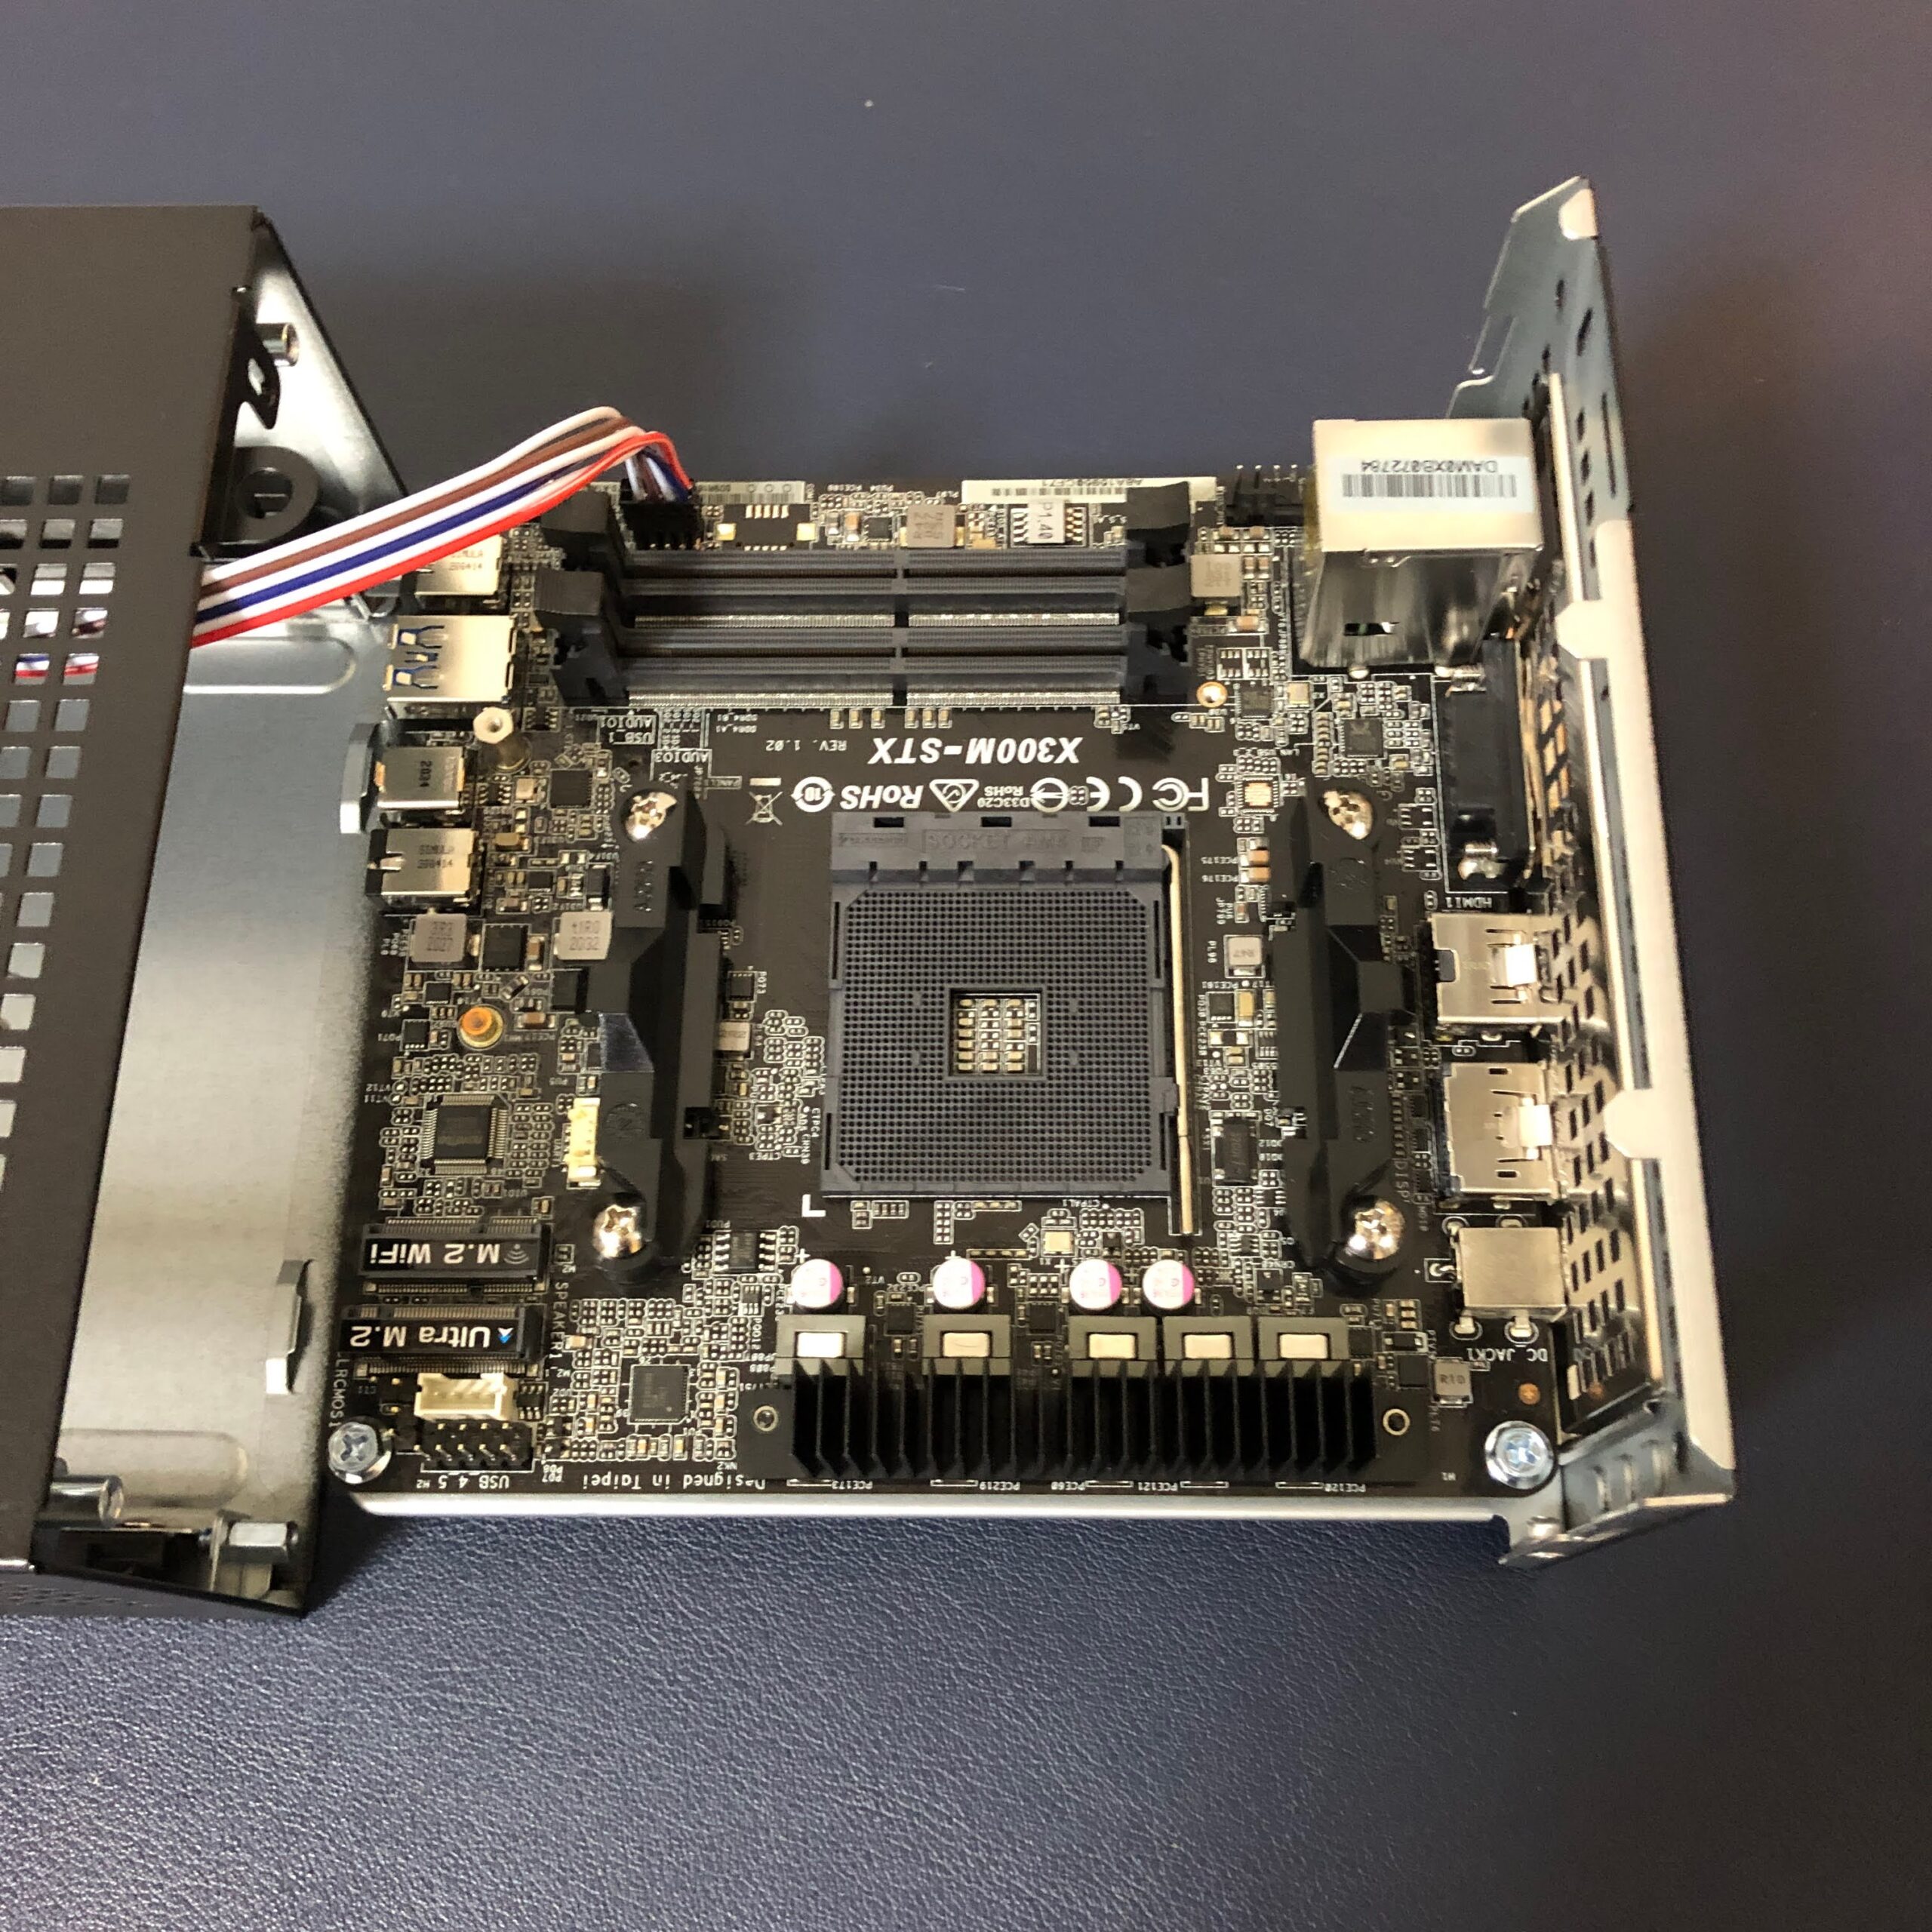
In the photo, the front panel cable is still connected, but I also disconnect it at this point.
Install the CPU
Install the CPU. I chose the AMD Ryzen 5 PRO 4650G this time. If you want more performance, the AMD Ryzen 7 PRO 4750G has the same 65 W TDP, so it should also work. I wonder if the Ryzen 7 5700G class will eventually become supported too?

Lift the socket lever and install it. Be careful not to get the orientation wrong. The triangle/circle mark at the lower left of the CPU and the triangle mark at the lower left of the socket have one fewer pin, so it will not fit in the wrong direction. Set it carefully so you do not bend any pins.

Lower the socket lever and the CPU installation is complete.

Replace the CPU Cooler
This time I installed a Noctua NH-L9a-AM4 instead of the standard cooler included with the motherboard. There is a detailed review, and it is very helpful.
This is a photo comparing it with the standard cooler. Not only the cooler but also the heatsink is larger, so it can improve cooling performance while keeping noise down. This is probably an essential item.

Installing the cooler was the most troublesome part of this build.
First, remove the standard cooler mounting parts.


Remove the four mount screws from the front, then remove the mount and the backplate on the rear side. Work carefully so you do not scratch the board.

Now install the NH-L9a-AM4. The screws are tightened from the back side, so it is a little awkward to work on.

The backplate looks like it could scratch components on the board, so after inserting the screws, I think it is best to temporarily hold them with masking tape or something similar.
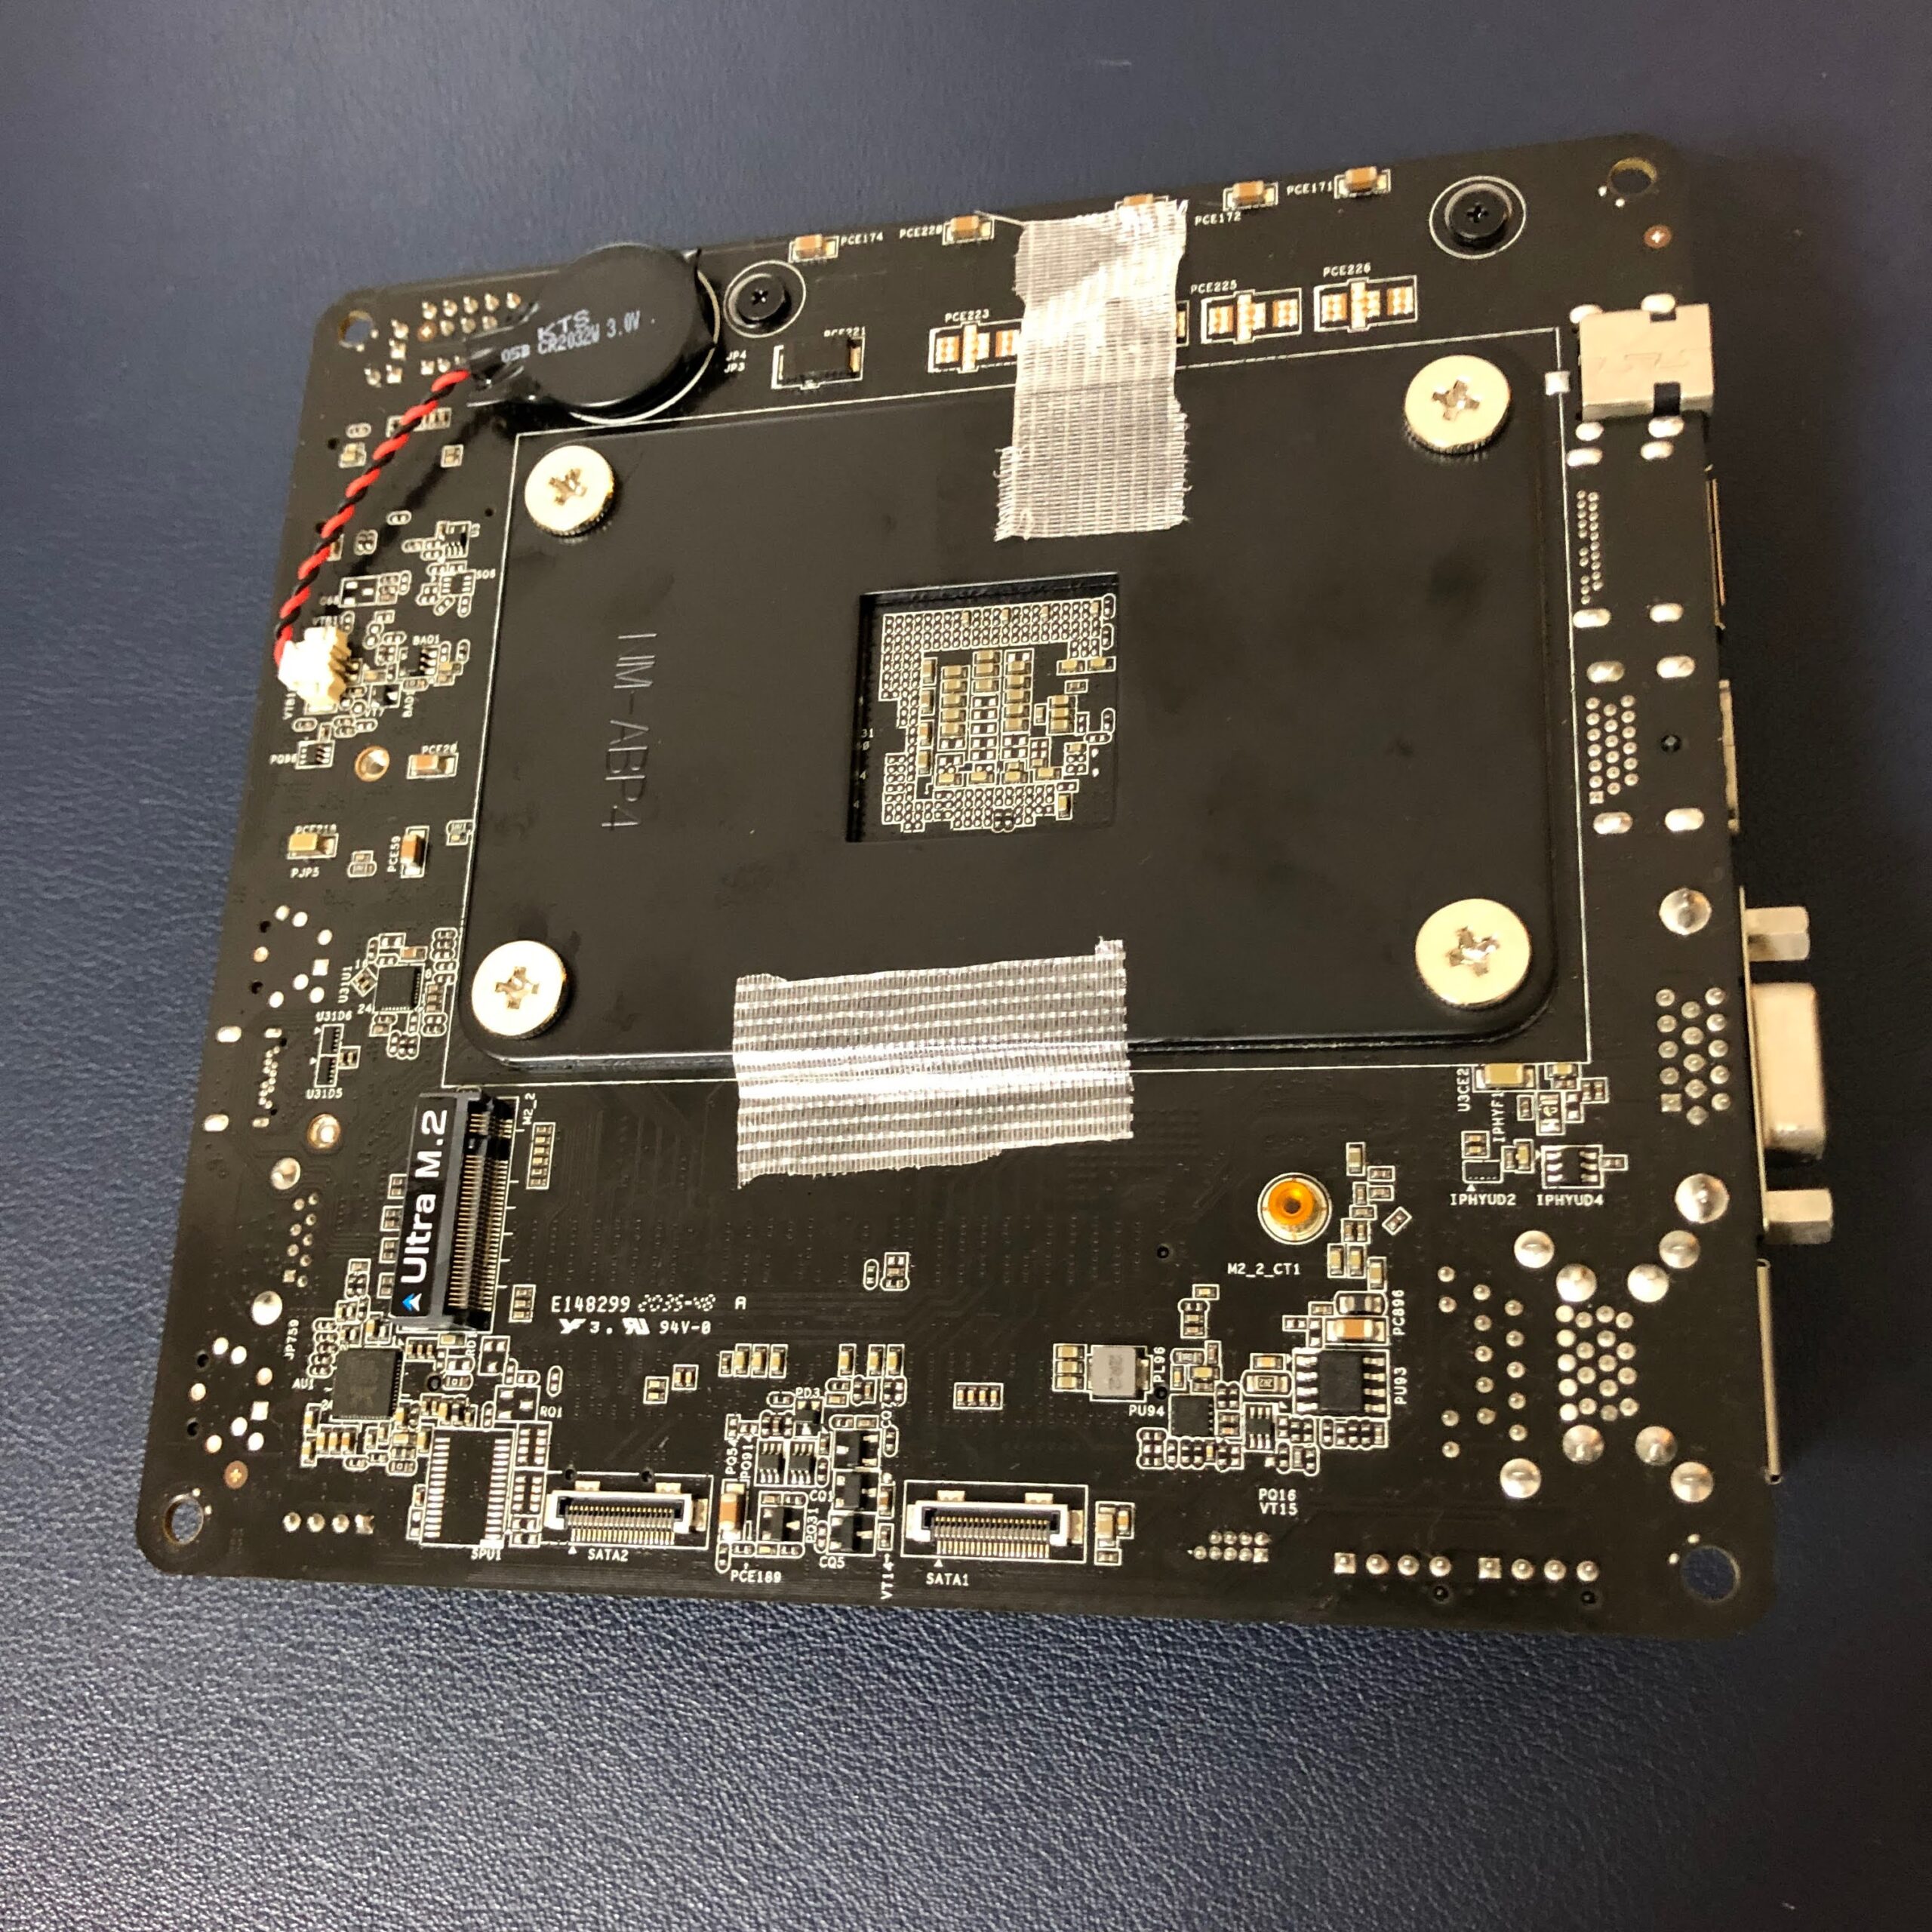
Prepare the cooler. I used the thermal paste included with the cooler.

I think it is enough to apply a roughly 5 mm square amount about 3-4 mm thick in the center of the CPU.

I was not sure of the cleanest way to install it, but I placed the cooler underneath and lowered the motherboard onto it. I wondered whether to put the cooler power cable on the right or left, but considering cable routing, I placed it so it came out on the right, toward the I/O ports.
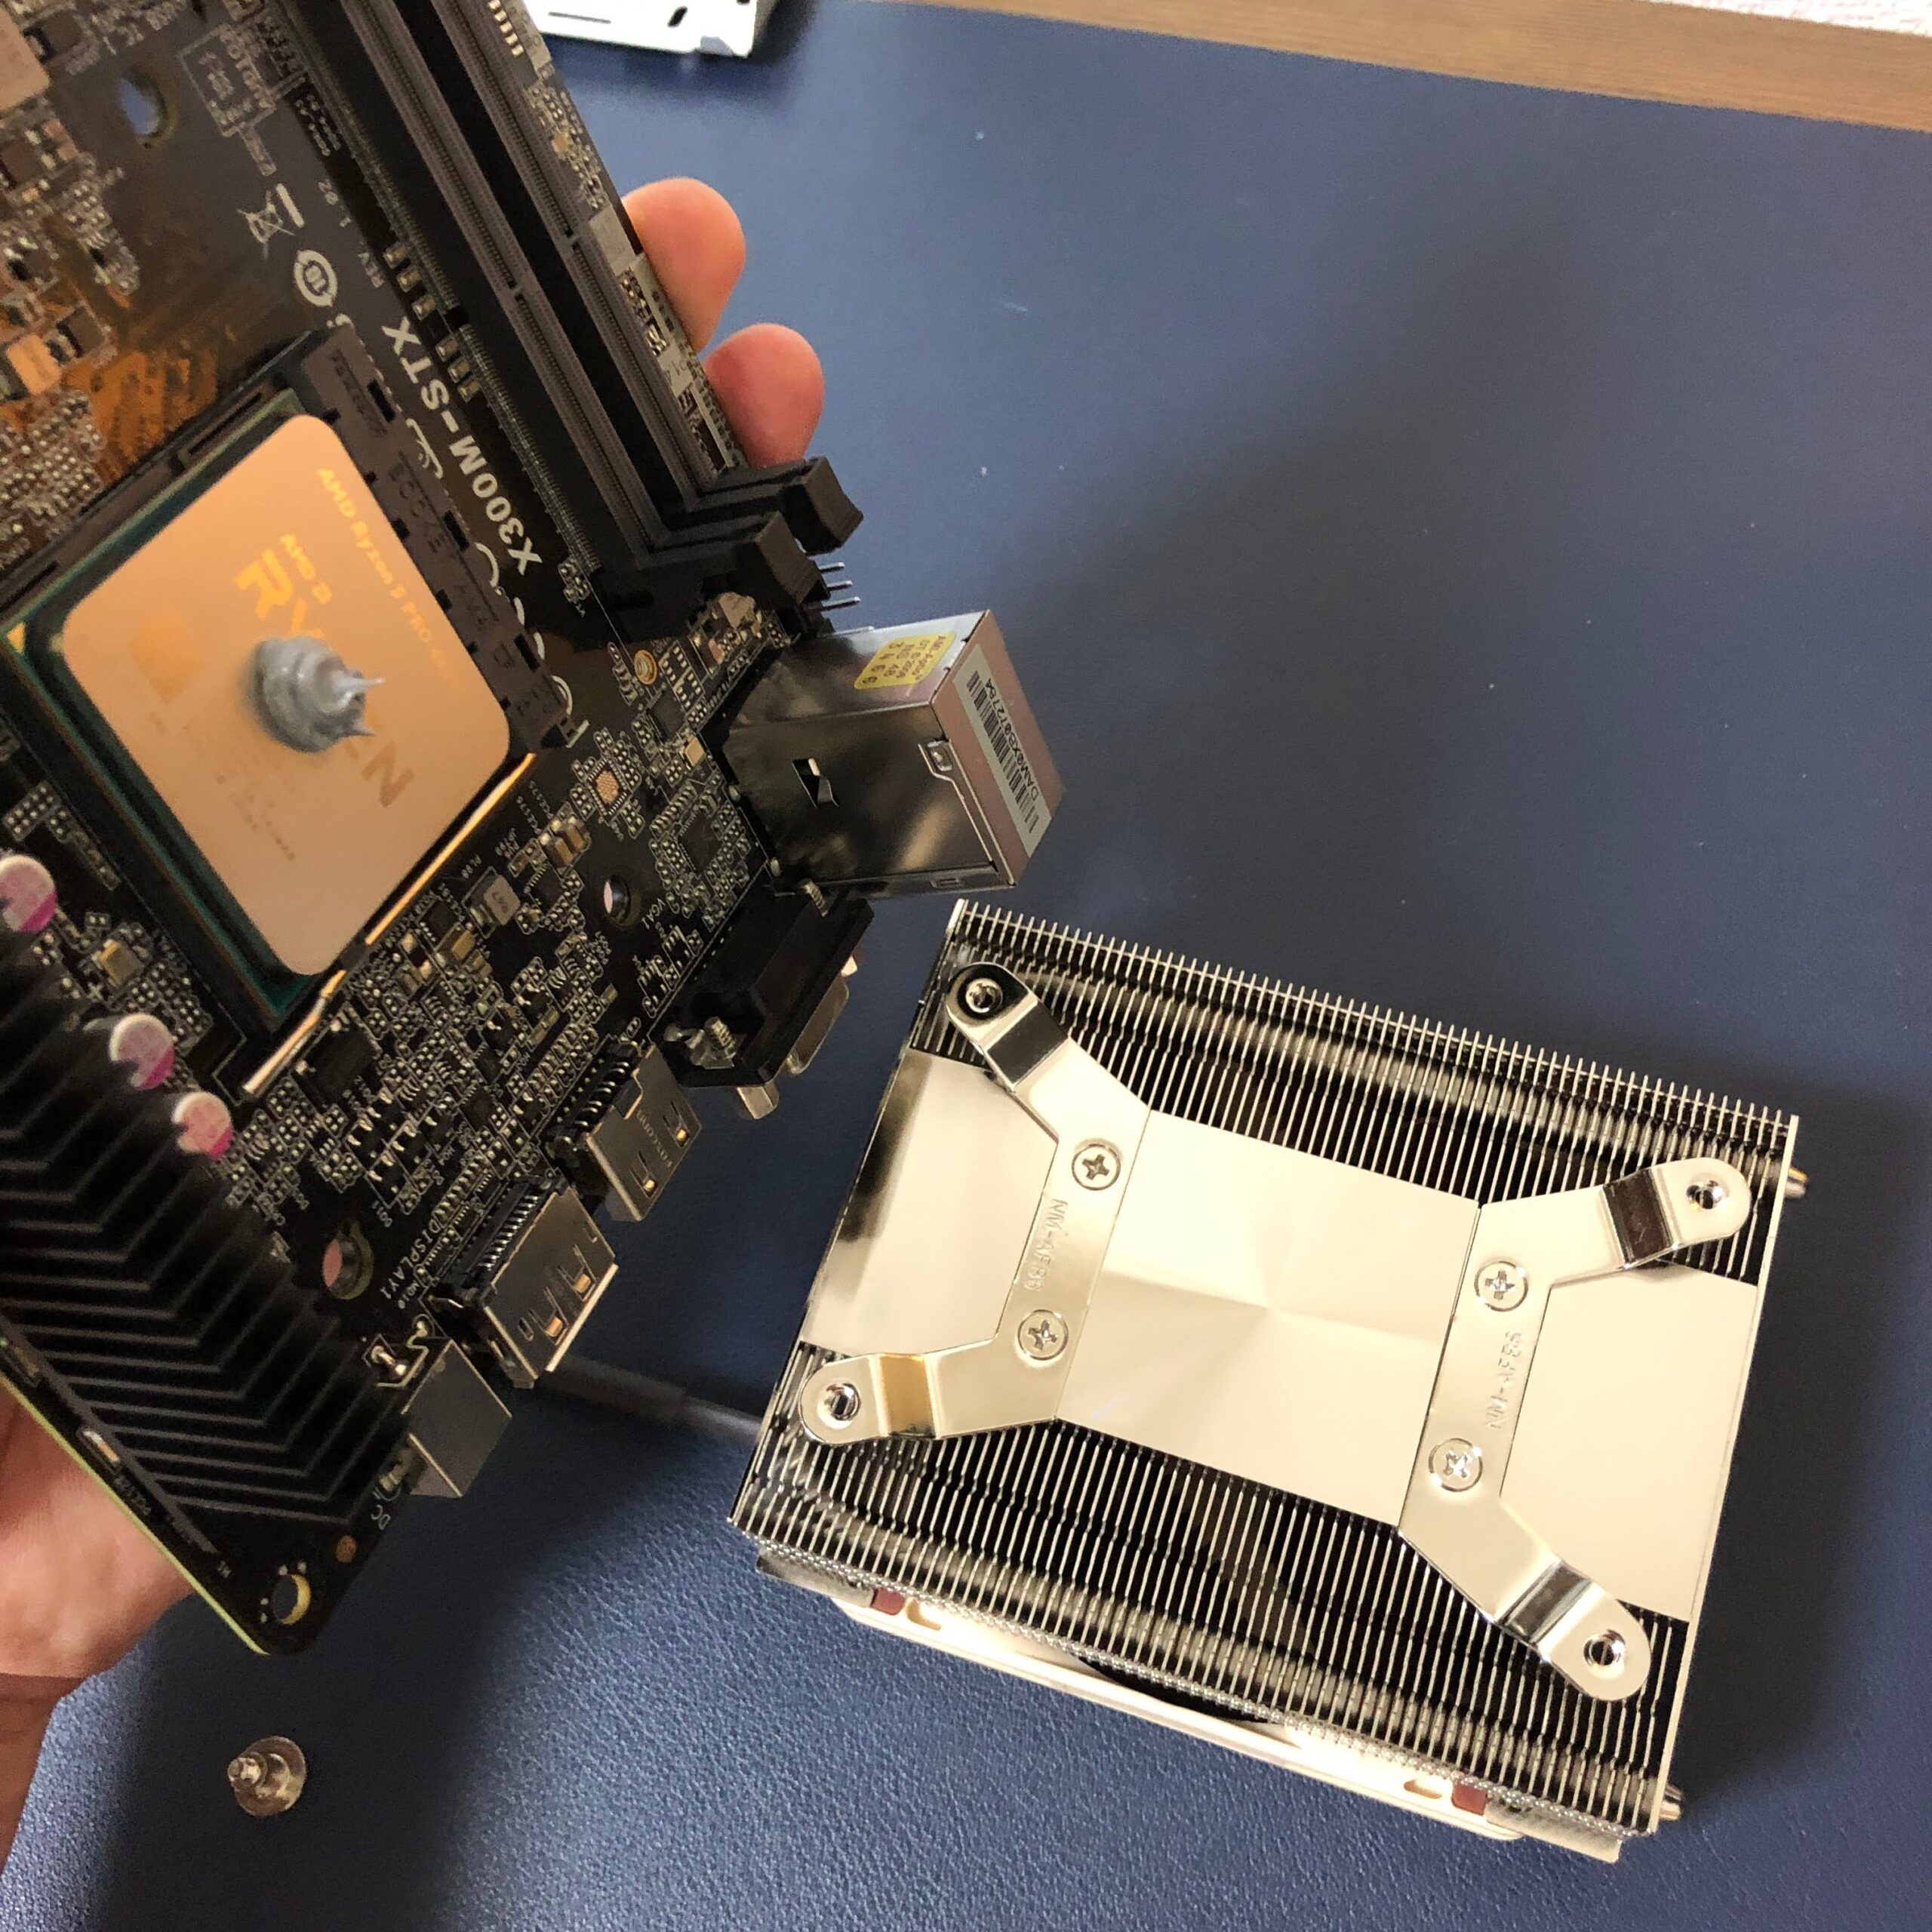
There is a little play, so do not tighten the screws all at once. Tighten them carefully while adjusting the position of the cooler and plate.
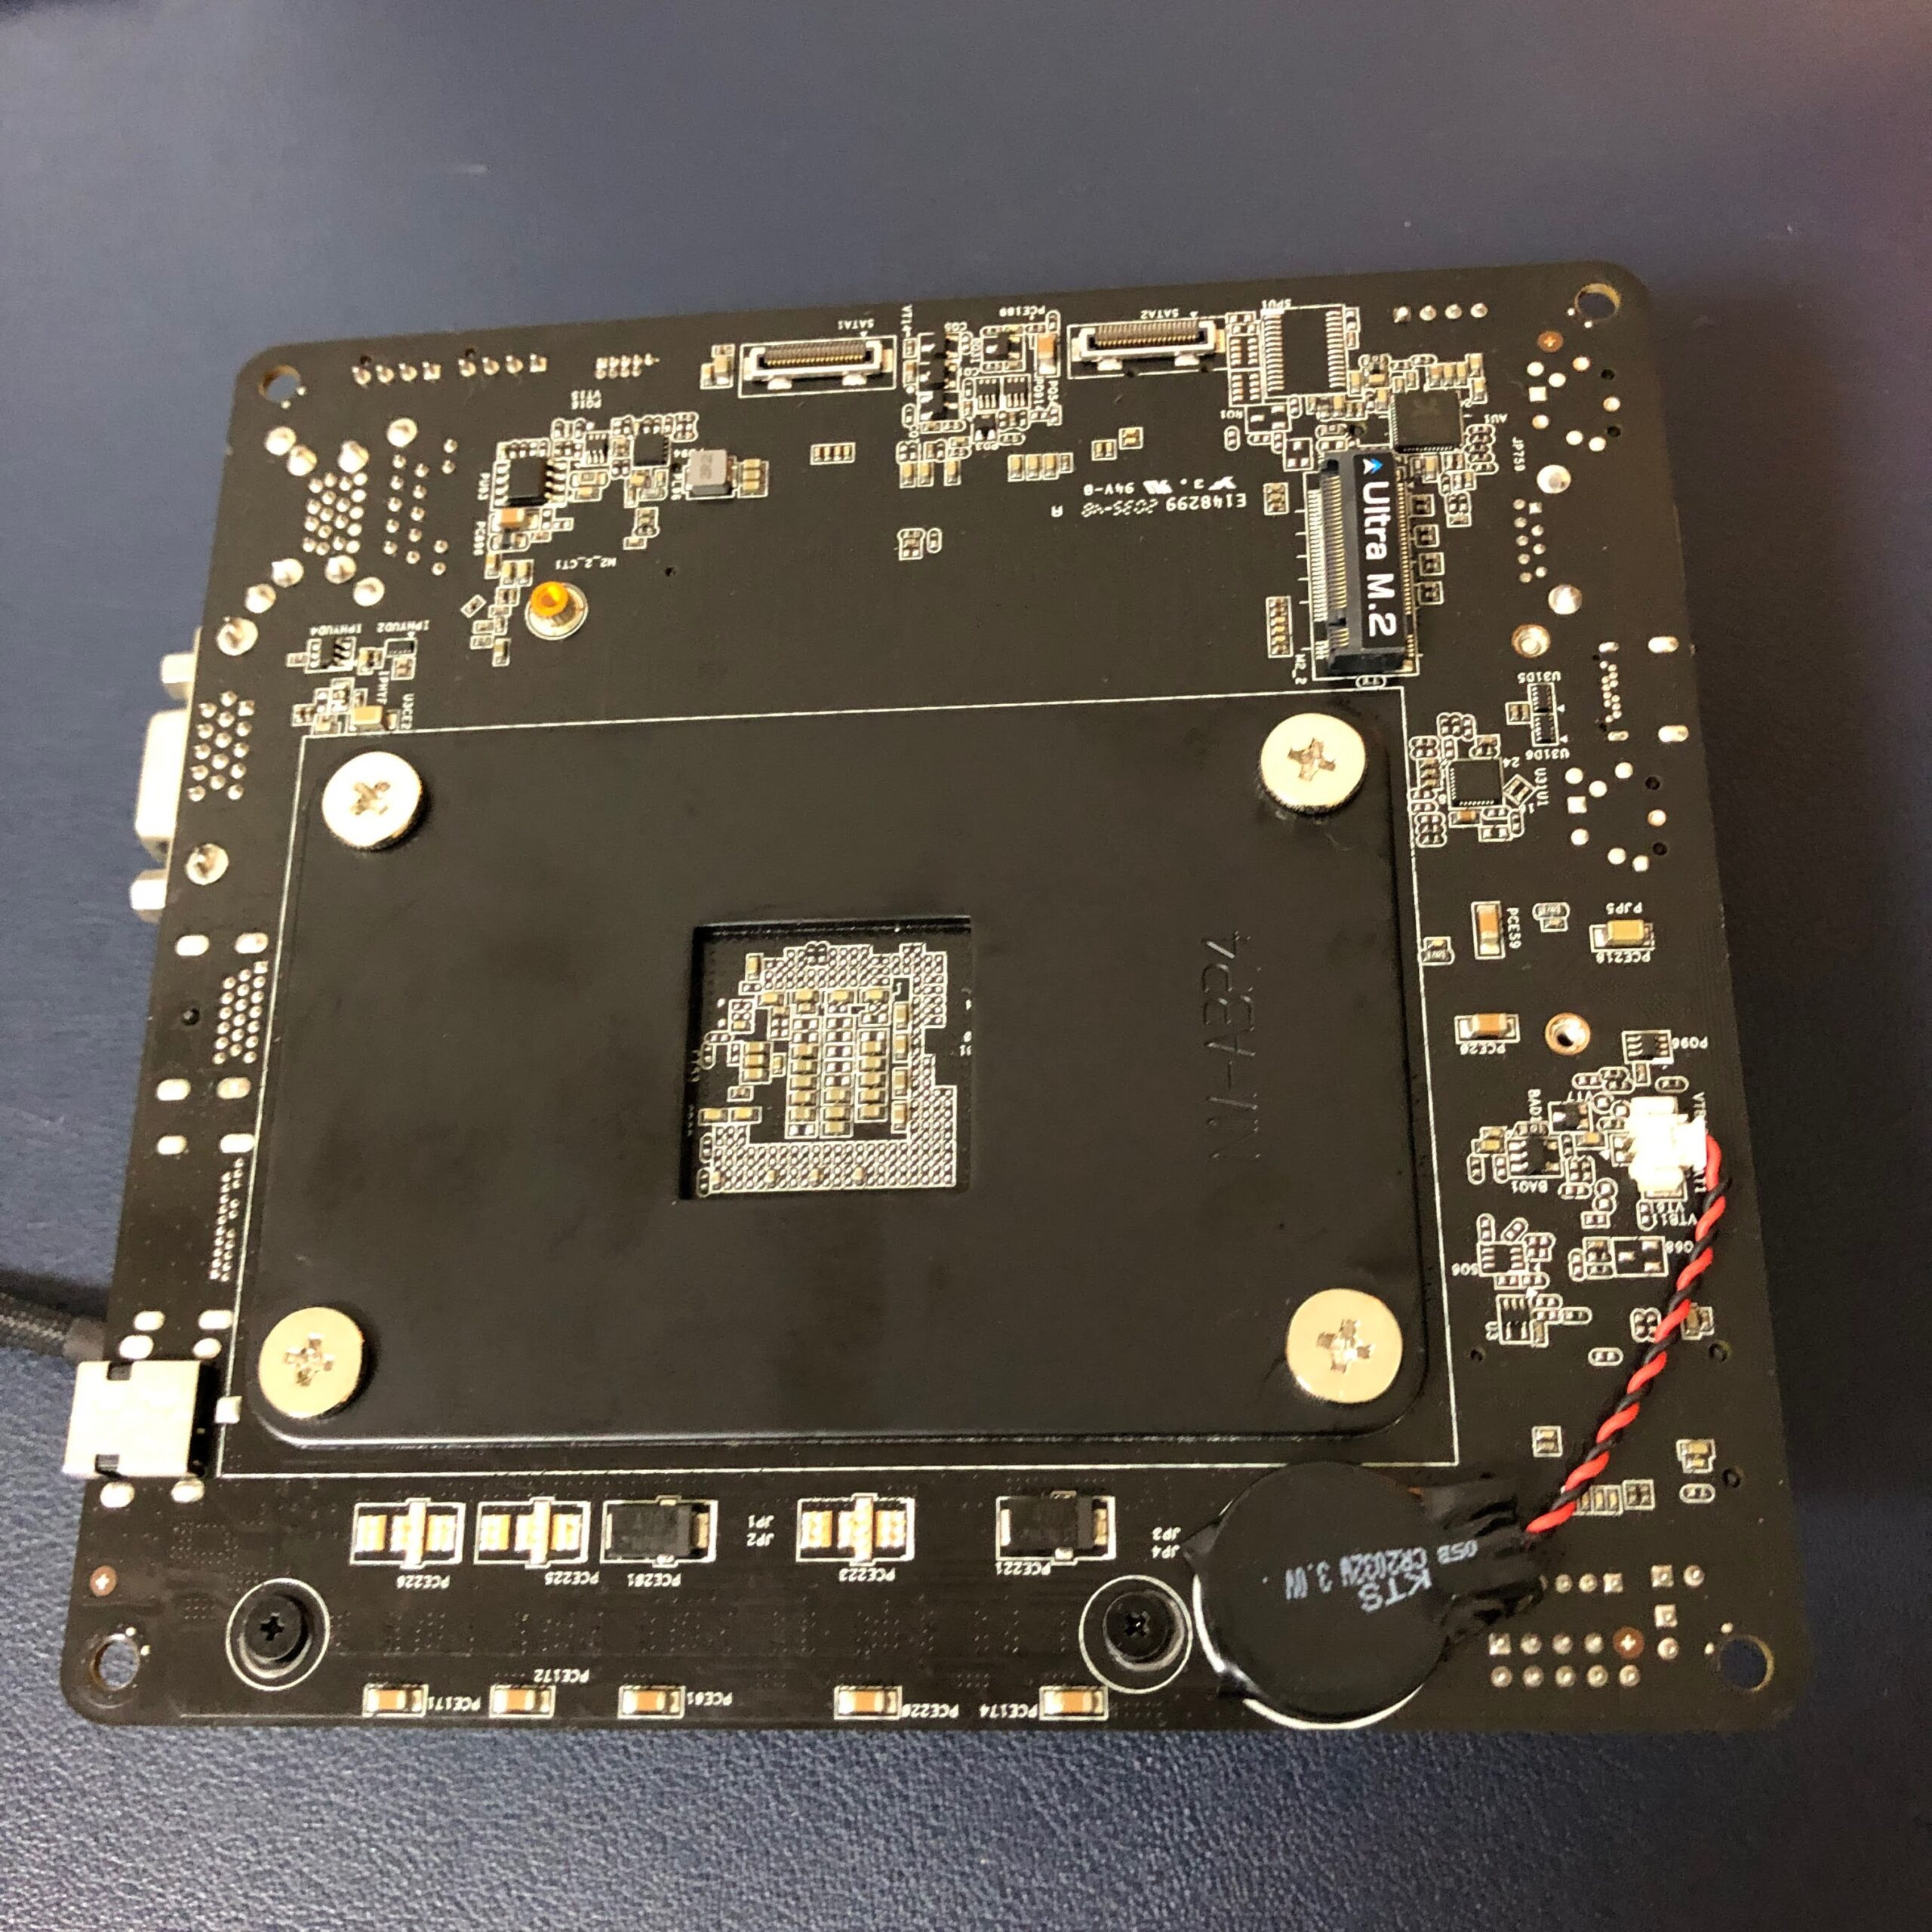
Once it is firmly tightened, it is done. The brown color looks nice too. Connect the power cable as well. It is a little long, so I looped it around and tucked it above the I/O ports.

It looks good. It did not show up in the photo, but a little thermal paste had squeezed out from the edge of the CPU, so the amount seems just right.

Install the Wi-Fi Module
Install the ASRock DeskMini Wi-Fi option kit.


Attach the antenna cables to the module first. They are tiny parts, so set them carefully to avoid damage. Align them straight from above, then snap them into place.

Insert it into the socket at about a 40-degree angle.

Press it down so it is level with the motherboard, then secure it with the black screw included with the barebone kit.
For now, I stopped here and left the antenna rods to install on the case later.

Install the SSD
Install the SSD so it overlaps the Wi-Fi module. It interferes with the protruding part of the CPU cooler, so insert it from underneath that protrusion at about a 30-degree angle.

Secure this with the black screw included with the barebone kit as well.

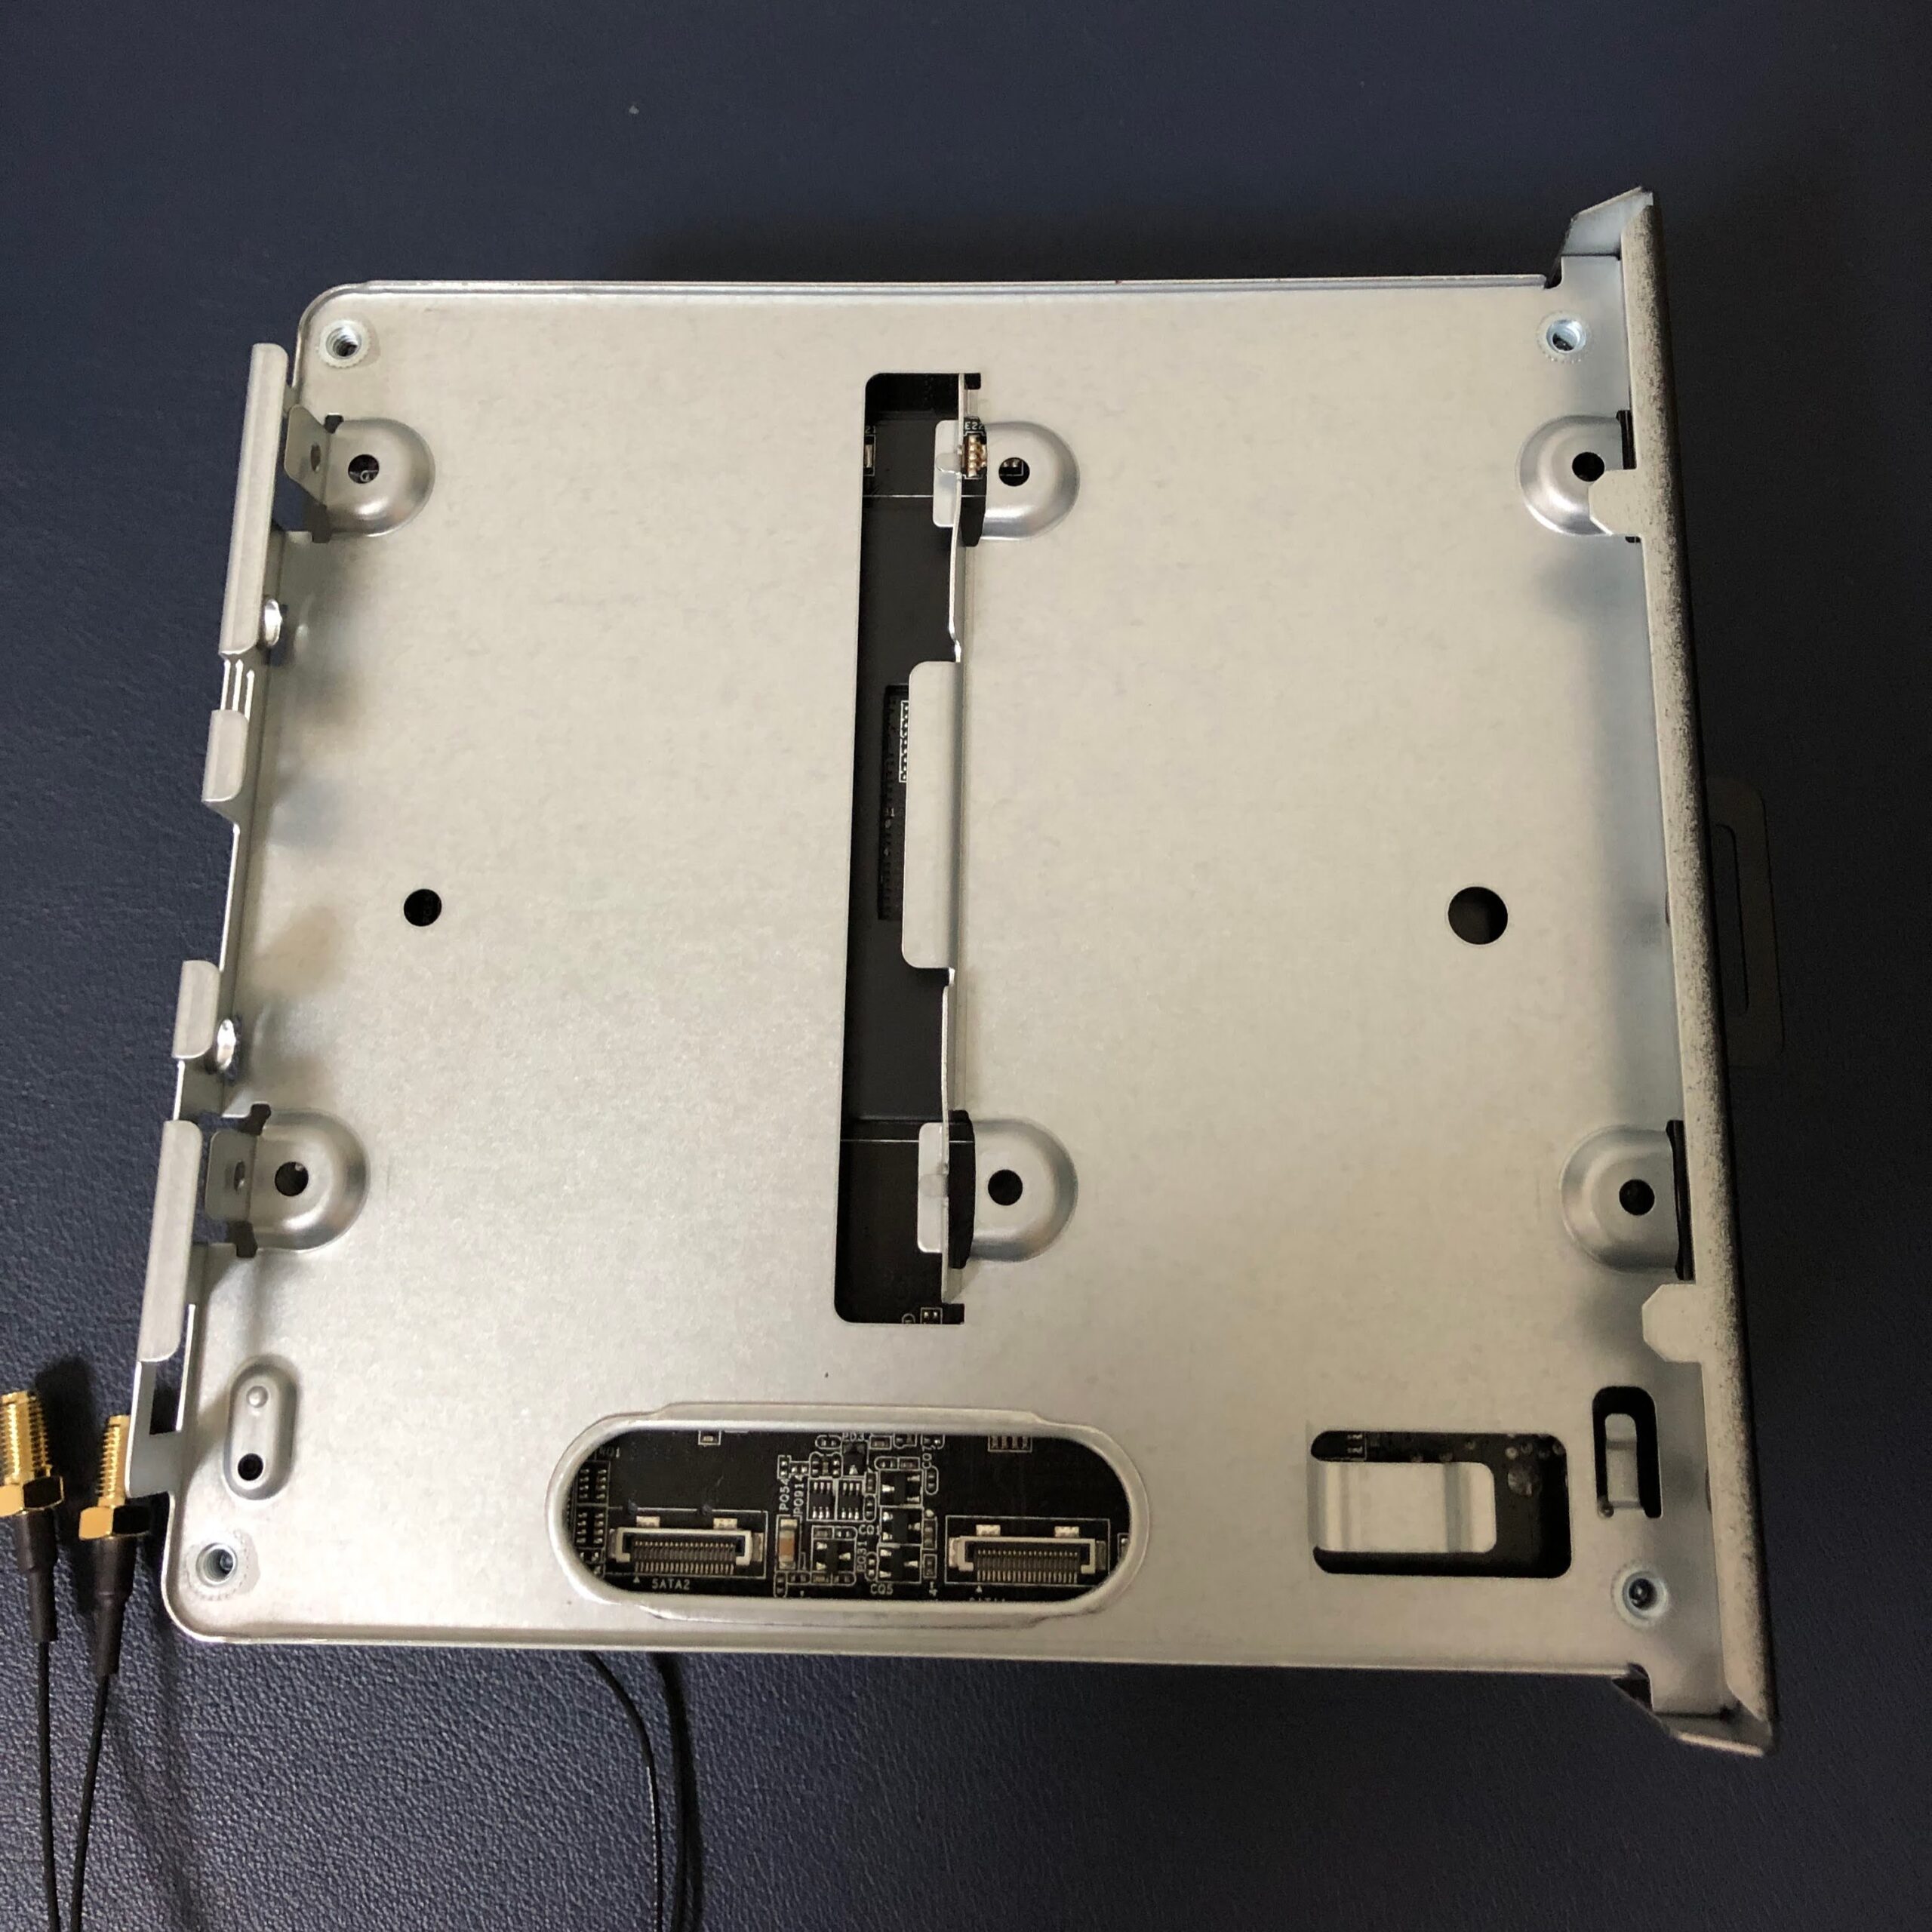
If you want to install 2.5-inch HDDs/SSDs, there are two mounting locations on the back. After connecting the included dedicated SATA cable to the HDD/SSD, connect it to the connector in the oval area. If you want to add another M.2 SSD, there is another M.2 connector near the CPU fan backplate, so you can probably use that.
Install the Memory
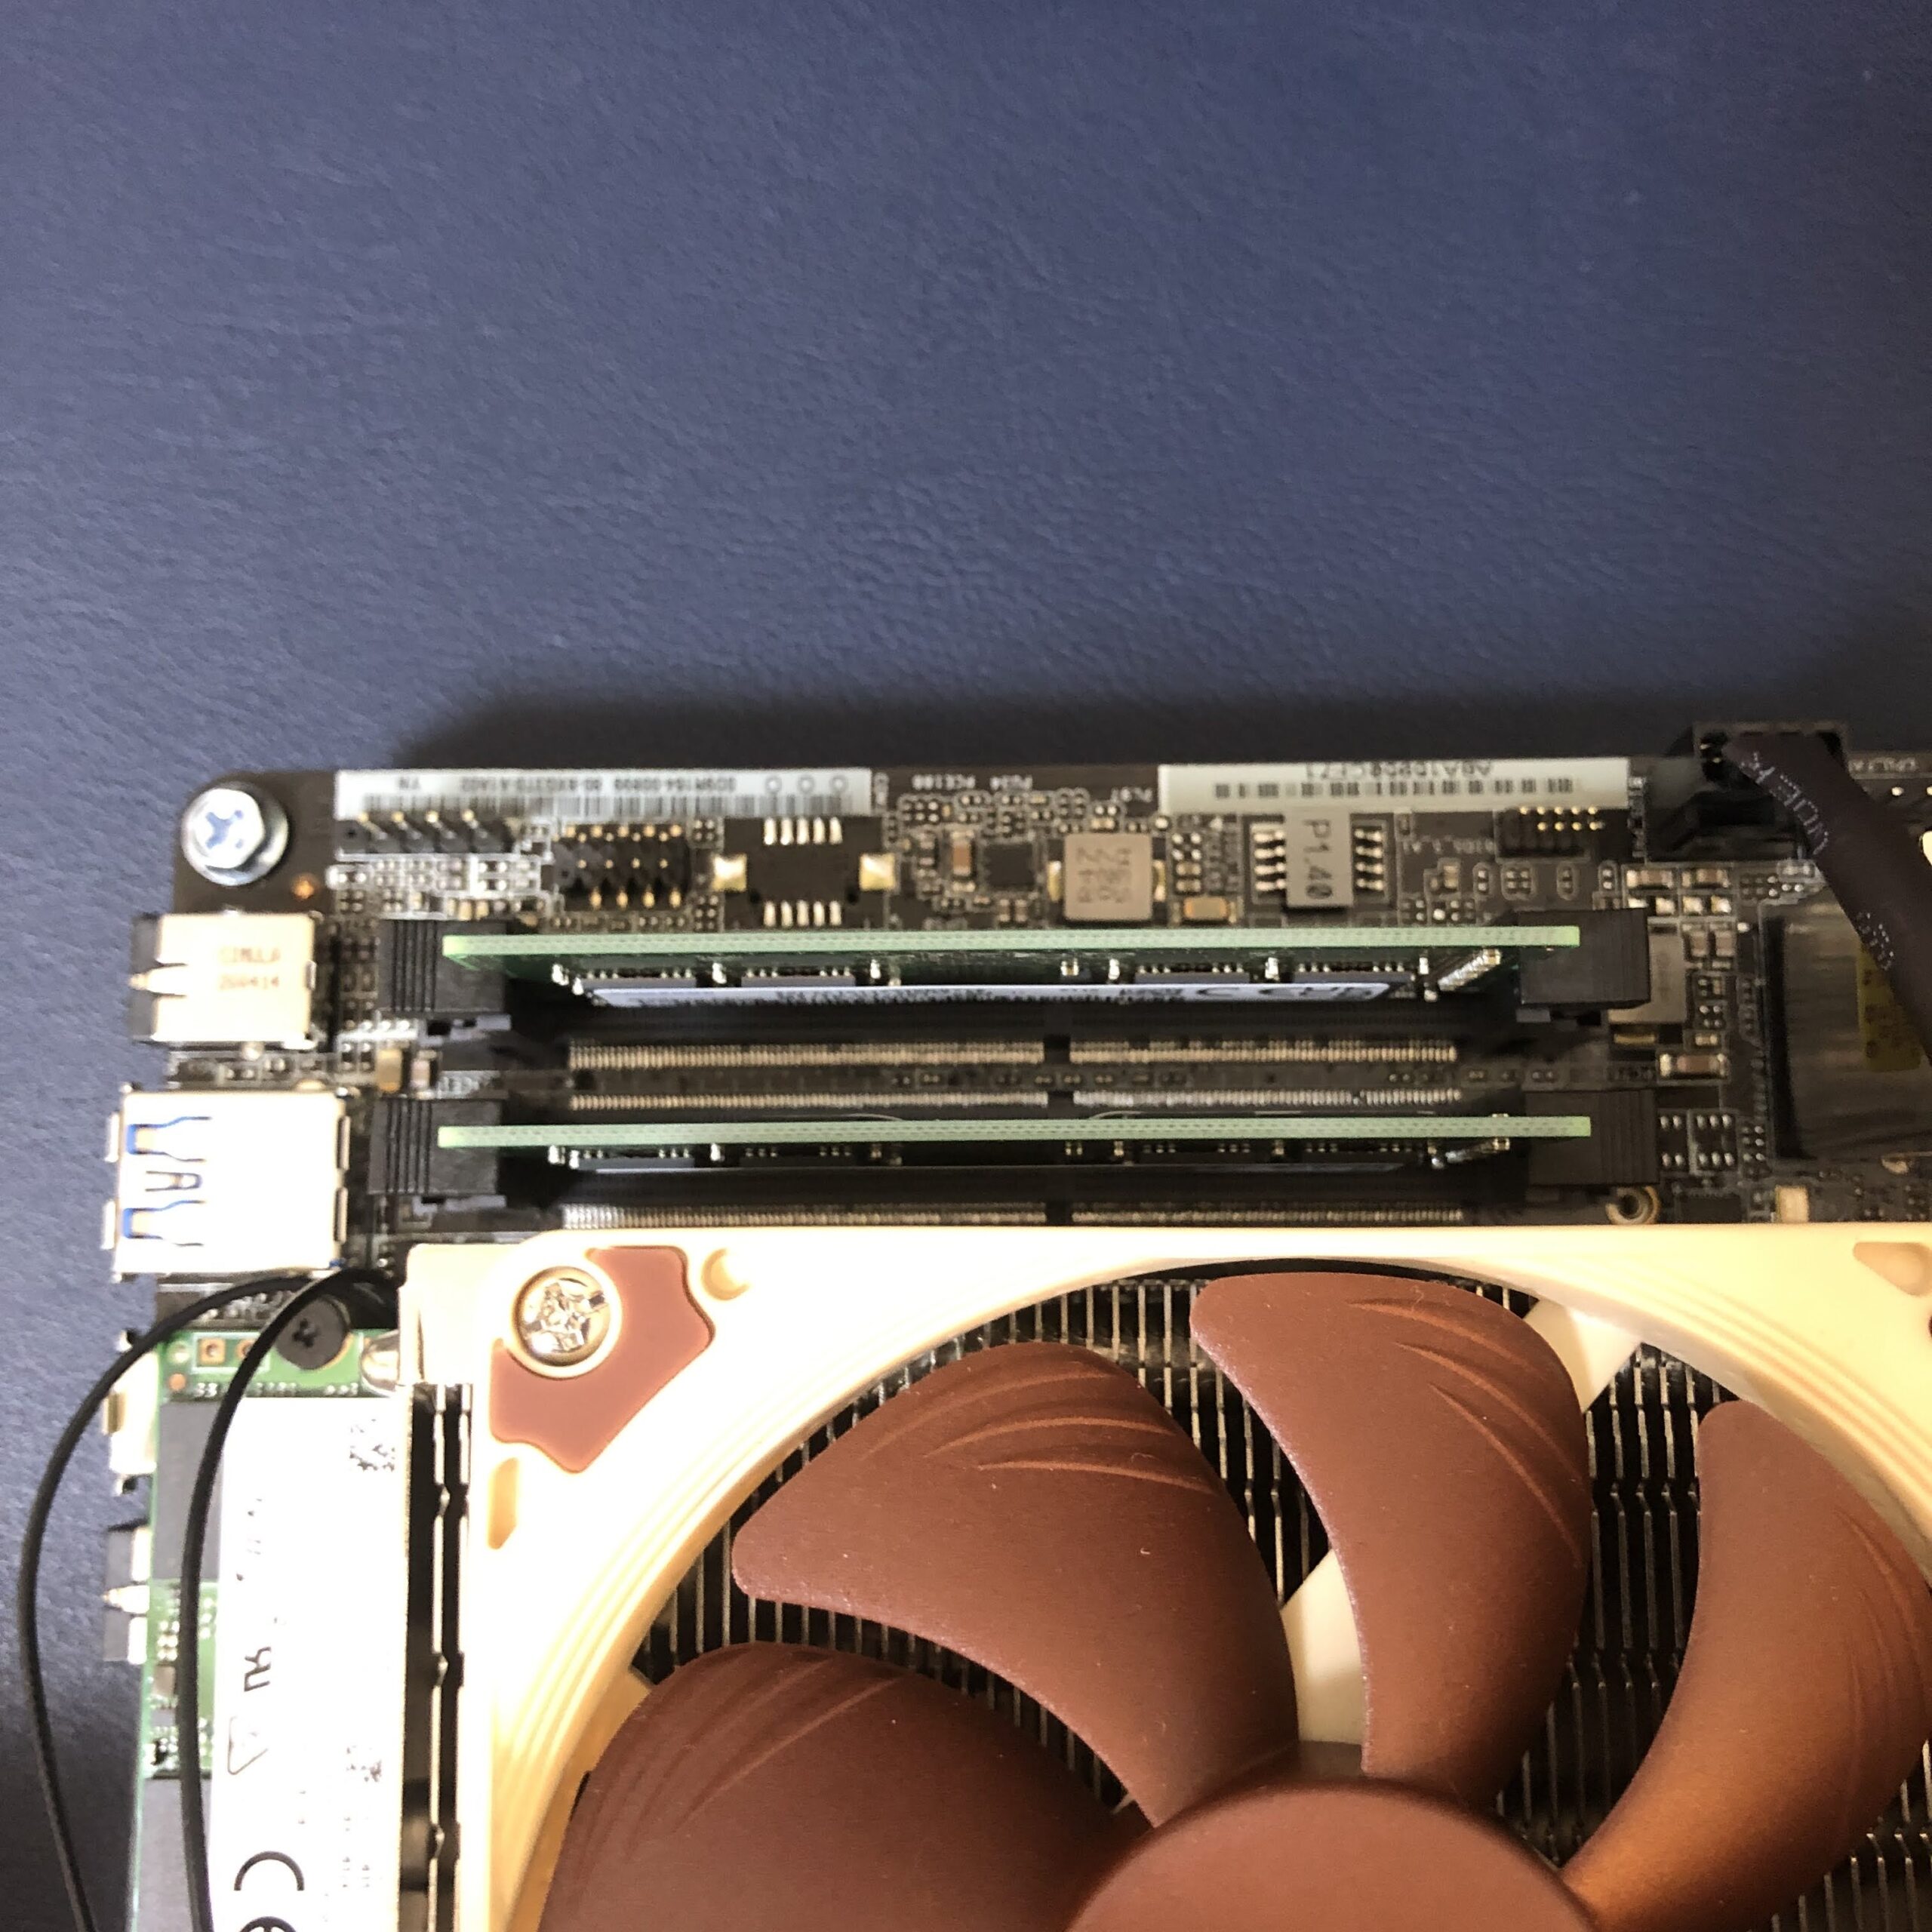
Install the two SO-DIMM memory modules.

There is nothing especially difficult here. Make sure they are seated firmly.
Install the Antennas
There are antenna mounting points on the upper side of the case back panel. Three circles are lined up, so push out the left and right two with a screwdriver or similar tool. Work carefully so you do not use too much force and damage other parts. Once it tilts as shown in the photo, you can easily remove it by working it back and forth with your fingers. Be careful not to hurt your fingers.

Attach the antenna wires connected to the Wi-Fi module. The screw section has a semicircular notch, so align that notch with the shape of the hole in the case and fit it in. Put the washer on, then tighten it with the nut.

Repeat the same process for both and it is complete. I think it is fine to attach the antenna rods at the very end.

Install the USB Ports
Now install the USB 2.0 port expansion cable. This is not essential, so I think you can add it only if you need it.

The side of the case has a prepared cutout for installing the USB ports.

Expose the opening in the same way as the antenna section. Compared with the antenna area, this part is much stiffer, so bend it back and forth until it comes off naturally. Be careful not to force it and damage parts or injure yourself.

Install the USB ports. I first tried installing them normally, but perhaps because I had changed the CPU fan, there was no space for the cable and the case would not close. I saw an Amazon review comment saying to "loop the cable around once before installing it," so I used that as a reference.
Put the exposed part of the cable into the gap by the port, then slowly pull it and loop it around. Be very careful not to scratch the cable while working.

It ends up like this. Because the cable loops around once, it becomes shorter, and the cable itself sits closer to the top of the case, making it less likely to interfere with the motherboard or CPU fan.

The port installation looks like this. There is some play here too, so do not tighten the screws all at once. Adjust the position while installing it. I think it is good if the silver frame of the USB ports appears even when viewed from directly above.

Connect the cable to the motherboard. Connect it where USB_4_5 is printed. Check the holes in the coupler and pay attention to the orientation when installing it. It is designed so it cannot be attached the wrong way around.

Put It Back in the Case
Return the motherboard to the case while adjusting the positions of the front panel cable and USB port cable.

Tighten the four case screws back into place. Attach the antennas too.

Attach the rubber feet to the bottom of the case and the assembly work is finished.

Finished
It is finished.
I worked slowly while taking photos this time, but even then I was able to finish it in about an hour.
Once the OS is installed, it will be a compact, quiet desktop with a decent amount of power.
I do hope the inability to use sleep gets improved.



I wonder if I should consolidate the Raspberry Pi home server here...